|           HOME           |           RECIPES           |           TIPS & TRICKS           |          

Showing posts with label vegetables. Show all posts

Sunday, August 17, 2014

"Un-fried" Squash

As I mentioned in my Fried Squash post, southerners love their fried squash. It can be breaded or battered. But... since we're trying to be healthy here, I decided to try an un-fried version! I think it tastes just as good as the fried version! In fact, it was so good I didn't feel like it needed any kind of dipping sauce. It was delicious on its own.

"Un-fried" Squash
Makes: 4 servings

2 summer squash
1/2 cup canola oil
2 cloves garlic, minced
1 tsp dried Italian herbs
1/2 tsp crushed red pepper flakes
1/2 tsp sea salt
  • Rinse the summer squash and pat them dry. Cut the squash into 1/2" circles. Set aside.
  • Make the marinade by mixing together the canola oil, garlic, herbs, pepper flakes, and salt.
  • Add the squash and marinade to a gallon size plastic bag, then toss to coat the squash. Marinate in the refrigerator for at least 1 hour.
  • Remove the squash from the marinade and grill on high for 2 minutes per side.
  • Serve as an appetizer or as a side dish.

Fried Squash

Fried squash is another southern treat that I was sadly deprived of until I moved to Charlotte. Apparently it's a big deal around here. Southerners love their fried squash. Almost as much as fried pickles haha! I've seen some people use a batter on their squash and some people bread it. I like it both ways, but today I decided to bread it. And... since it's swim suit season, I'll decided to try my hand at some "Un-fried" Squash. They both came out excellent if I do say so myself!


Fried Squash
Makes: 4 servings

2 medium summer squash
2 cups plain bread crumbs
1/2 tsp sea salt
1/2 tsp garlic powder
1 tsp dried Italian herb mix
1/4 tsp cayenne pepper
2/3 cup flour
4 eggs
1/4 cup milk
canola oil for frying


  • Fill a stainless steel fry pan with 1" of oil and preheat over medium-medium-high.
  • Rinse the summer squash and pat them dry. Then cut them into 1/4" slices. Set aside.
  • Mix together the bread crumbs, salt, garlic, herbs, and cayenne pepper.
  • In a separate bowl, whisk together the eggs and milk.
  • Dip the squash into the flour, then the egg mixture, then the bread crumb mixture.
  • Once all of the slices of squash are coated in bread crumbs, lay them out in a single layer on a plate and allow to sit for at least 5 minutes. This will allow the breading to harden a little bit and prevent cracking when you fry it.
  • Fry the squash in batches, making sure not to overcrowd the pan. Once the squash is golden brown, about 3 - 4 minutes per side, remove from the oil and allow to drain.
  • Serve with dipping sauce such as marinara.

Monday, August 4, 2014

Spinach Sauté

This recipe is pretty similar to my Spinach and Mushrooms recipe from a couple months ago. But I added a little flair to it with some red pepper so I figured it deserves its own post. Plus spinach is in peak season right now so you can never have too many spinach recipes!

Spinach Sauté
Makes: 4 servings

8 oz mushrooms
1 clove garlic, minced
1/2 yellow onion, very thinly sliced
1 red pepper, 1/2" dice
1 tbsp olive oil
1 tbsp butter or margarine (I used Smart Balance)
4 big handfuls of baby spinach
pinch of sea salt

  • Rinse the mushrooms well, cut off the stems, then cut them into thin slices.
  • Over medium heat, saute the mushrooms, garlic, onions, and peppers in the olive oil and butter. Sprinkle a pinch of sea salt over the mixture. The mushrooms will release quite a bit of liquid. The liquid will eventually evaporate. Continue cooking until the mushrooms are a light golden brown and the onion and pepper are soft. Total cooking time will take about 12 - 15 minutes.
  • Add the spinach to the mushroom mixture, sprinkle another pinch of sea salt on the spinach. Cook until the spinach is just wilted, about one minute.


This is a great side dish for dinner or toss in some sliced grilled chicken for a filling lunch!

Sunday, June 29, 2014

Honey Ginger Glazed Carrots

I've said this before and I'll say it again: if you don't like vegetables, it's probably because you're making them wrong. And not that it's your fault, you were probably shown wrong. But today is a new day! Vegetables, like any other food, need to be cooked well and seasoned well in order to taste good. Just steaming them and plopping some butter on there just isn't enough (in most cases). Imagine if you just steamed a piece of chicken and then sprinkled a little salt on there and that's it? Yuck...

So how do you add flavor? There are two ways:
  1. Cooking method - grilled, braised, roasted, sauteed, etc.
  2. Flavorings - compound butter, various herbs and spices, cheese sauce, teriyaki sauce, pesto, etc.
Honey Ginger Carrots
Makes: 4 servings

1 lb baby carrots
1 tbsp butter or butter substitute (I use smart balance)
1 tbsp olive oil
1/4 cup soy sauce
2 tbsp honey
1/2 tsp ground ginger
parsley for garnish
  • Saute the carrots in the butter and olive oil over medium high heat for about 10 - 12 minutes until the carrots are soft but still slightly crunchy - not mushy at all.
  • Add the soy sauce, honey, and ginger and toss the carrots. Continue to cook for about one more minute. The sauce will thicken into a nice sticky glaze.
  • Serve with some fresh parsley. I picked mine fresh from my garden! It added a nice delicate lemony flavor.
That's it! This is a nice quick recipe that you can pull together while you've got some chicken or fish baking in the oven. It will taste way better that those frozen deals with the pre-made sauces

*You could also use fresh grated ginger for this recipe if you want. Just remember to double the amount.

Monday, June 23, 2014

Baba Ganoush


I made some grilled egg plant for dinner which turned out really yummy. But I had a bunch left over and I wasn't really sure what to do with it. After some thought, I settled on Baba Ganoush. This is another yummy treat that I learned how to make when I was working at the country club. It's a dip made from roasted egg plant, garlic, and sesame tahini and it is delicious! If you love hummus, you will probably love this too!

I'll give you the instructions for how to make this with grilled eggplant since that's what I had on hand. But if you don't want to go through the extra work of grilling it, you can just cut the egg plant in half and roast it in the oven until it is golden brown and soft then scoop out the soft center.


Baba Ganoush
Makes: 4 servings

1 large eggplant
1/2 cup canola oil
2 cloves garlic, minced
1 tsp sea salt
1 tsp cracked black pepper
1/4 cup sesame tahini
2 tbsp lemon juice
salt

  • Wash the eggplant then slice it into 1/2" slices all the way down.
  • Make the marinade by mixing together the oil, garlic, salt, and pepper.
  • In a plastic bag, toss together the eggplant with the marinade. Allow the eggplant to soak for at least 30 minutes before cooking.
  • Preheat the grill on high. Once hot, place the slices on the grill and cook for about 3 - 4 minutes per side.
  • Place the eggplant slices in a food processor and puree. The mixture will seem a little lumpy. Add the sesame tahini and lemon juice and continue to puree; the mixture smooth out.
  • Taste the dip and add salt as needed.
  • Serve with naan bread, pita bread, veggies, or anything else you could possibly dip in there! This can be served hot, room temperature, or cold.

In case you've never used sesame tahini before, this is what it looks like. It comes in a jar and it's pretty runny stuff; it's a pour-able liquid. You can find it in the Asian section of almost any grocery store. Tahini is a great ingredient to keep on hand. You can use it in marinades, salad dressings, and all kinds of dips.


Monday, May 19, 2014

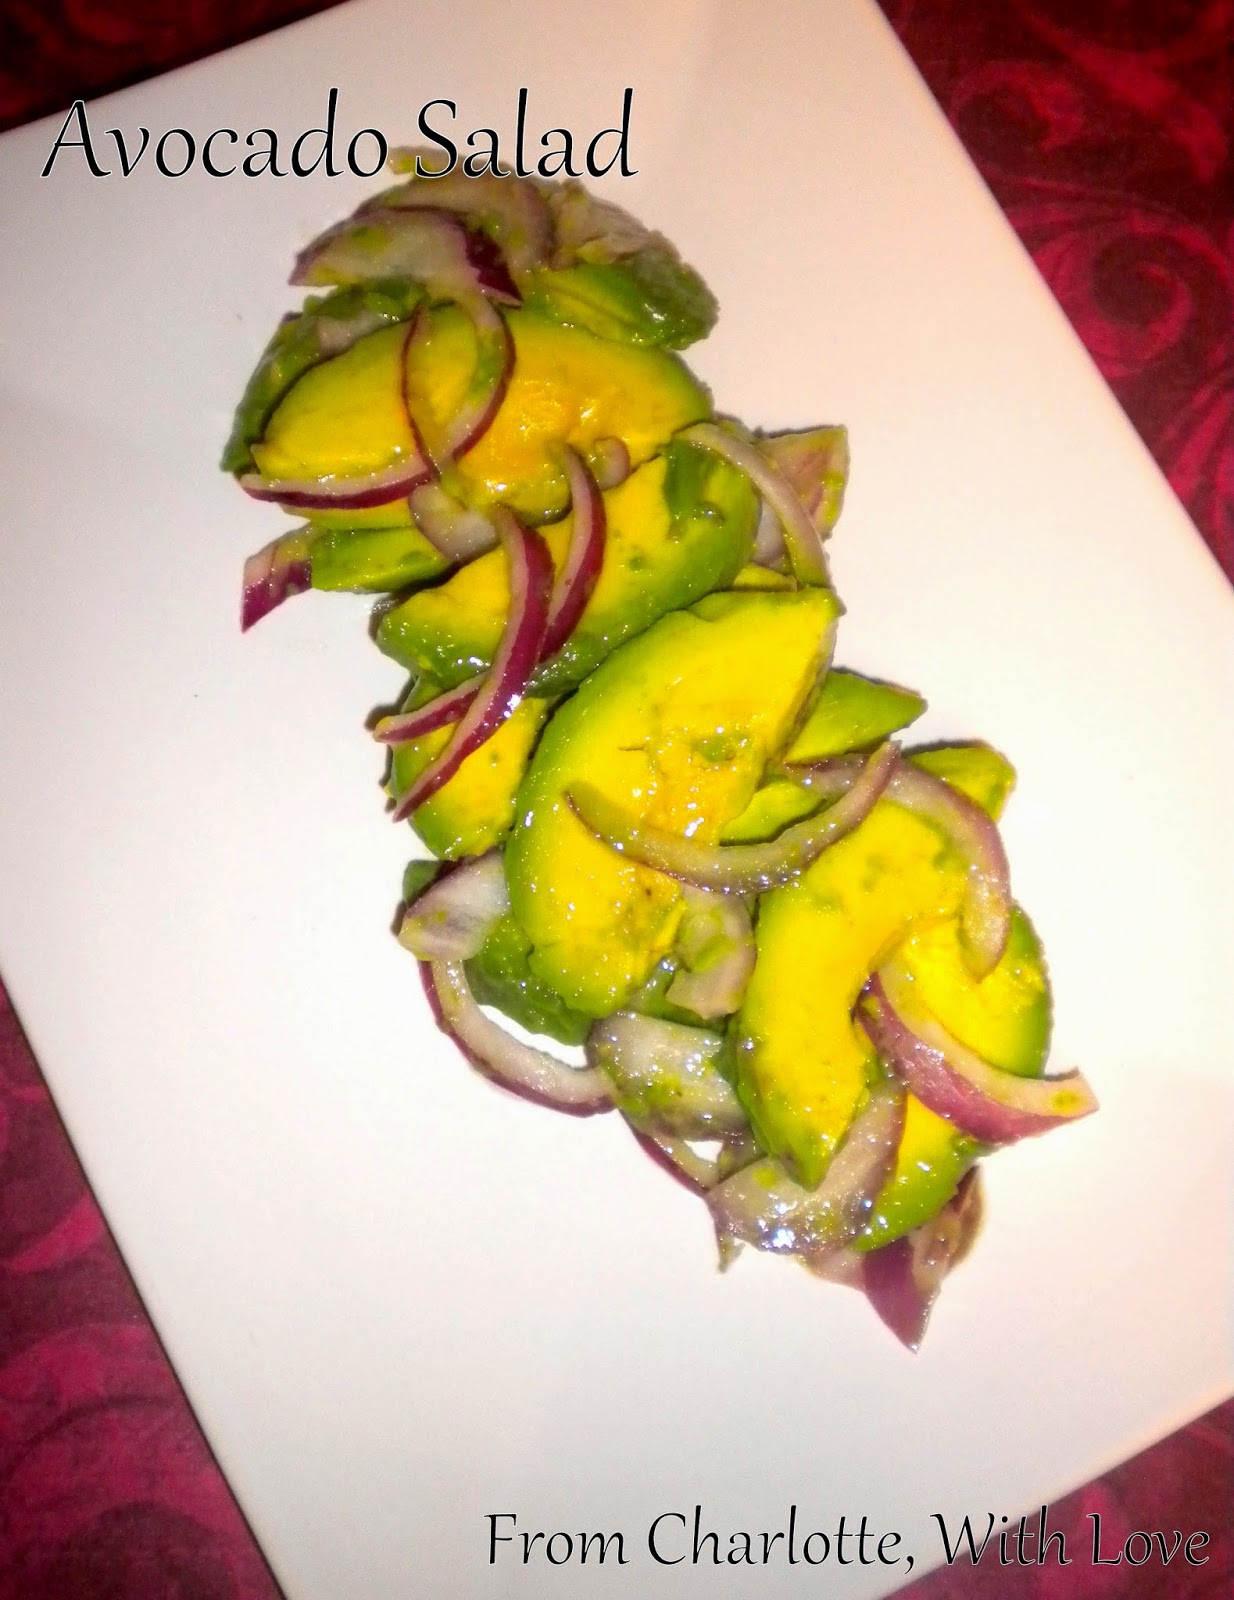
Avocado Salad

I actually got the recipe for avocado salad from my boss. She was eating it at work one day and it looked really good so I asked her about it. She told me she had it at a restaurant and it was so good she went home and recreated it. It's super simple but amazingly delicious. You can make a single serving for a light lunch or several servings as an appetizer for a get-together.

Avocado Salad
Makes: 1 serving

1 ripe avocado
3 - 4 paper thin slices of red onion
1 tbsp olive oil
1 tbsp lime juice
pinch sea salt
  • Cut the avocado in half and remove the pit. Cut each half into slices, then scoop them out of the shell. Place the slices in a glass bowl.
  • Add the onion, olive oil, lime juice, and sea salt. Gently fold it all together with a spoon or rubber spatula.
  • Serve on a bed of baby spinach, with some tortilla chips, or with a warm flour tortilla.

Monday, May 5, 2014

Spinach & Mushrooms

As promised, I'm trying to get as much use as I can out of the wonderful spring fruits and vegetables. I just love spinach, especially baby spinach. This is a quick, simple vegetable side dish with a ton of flavor. This might even be the one that gets your kids to eat spinach!!


Spinach & Mushrooms
Makes: 4 servings

8 oz mushrooms
1 clove garlic, minced
1 tbsp olive oil
1 tbsp butter or margarine (I used Smart Balance)
4 big handfuls of baby spinach
pinch of sea salt

  • Rinse the mushrooms well, cut off the stems, then cut them into thin slices.
  • Over medium heat, saute the mushrooms and garlic in the olive oil and butter. Sprinkle a pinch of sea salt over the mushrooms. The mushrooms will release quite a bit of liquid. The liquid will eventually evaporate. Continue cooking until the mushrooms are a light golden brown. Total cooking time will take about 12 - 15 minutes.
  • Add the spinach to the mushrooms, sprinkle another pinch of sea salt on the spinach. Cook until the spinach is just wilted, about one minute.
  • This makes a nice bed for a piece of grilled chicken or steak!

Wednesday, April 30, 2014

Split Pea Soup

This is the last of my Easter left-overs recipes. My grandpa grew up on a pig farm and his favorite meal was split pea soup with ham. I think he would have really liked this one. It's simple but it makes great use of the left-overs from a ham dinner.


Split Pea Soup
Makes: 6 servings

6 cups water
1 ham hock (or bone left-over from a ham dinner)
1 tbsp olive oil
1/2 onion, 1/2" dice
1 lb split peas
1 cup ham, finely diced
1/2 tsp cracked black pepper
1 - 2 tsp chicken bouillon

  • Make the ham broth by covering the ham bone with the six cups of water. On high heat, bring to a boil, then cover and reduce the heat to low. Simmer for one hour.
  • Remove the ham bone from the broth. Set the broth aside.
  • In the bottom of a large soup pot, saute the onion in the olive oil over medium heat until soft, about five minutes.
  • Add the six cups of ham broth, split peas, ham, and black pepper. Bring to a boil over high heat. Reduce heat to low and simmer, stirring occasionally, until the peas are tender, about one to one and a half hours.
  • If the soup seems too thick, add some water.
  • Test the soup, if it tastes a little bland, add some chicken bouillon, one teaspoon at a time.
  • Serve with a piece of crusty bread.

Monday, April 28, 2014

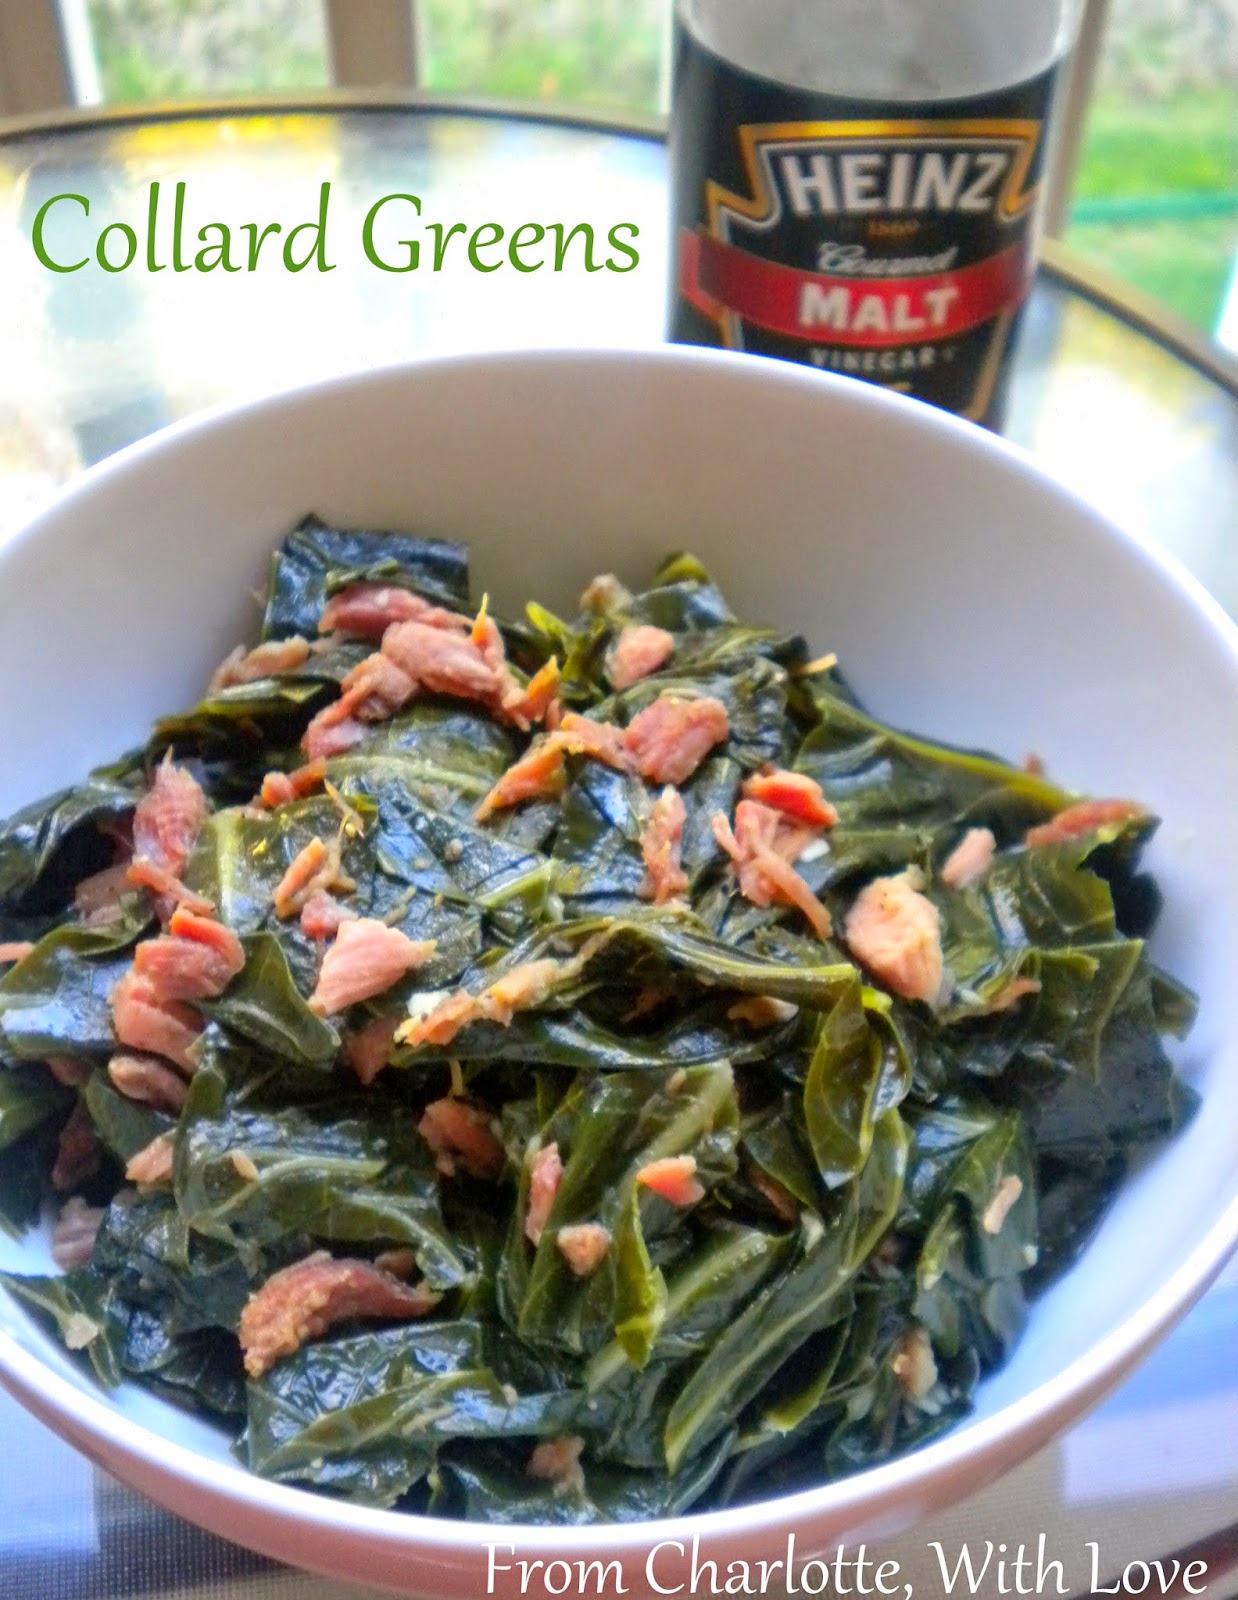
Collard Greens

Hi, Frank!
Collard greens are definitely a Southern staple. I had heard of them before we moved here, but only because we feed them to our iguana, Frank. So it took me a while to think of them as people food and not just iguana food. But I've definitely gotten over that mental block by now and I love collard greens! They are so yummy.


Collard Greens
Makes: 6 servings

2 cups water
1 ham hock (or leftover ham bone from a ham dinner)
1 large head of collard greens
1/2 cup finely chopped ham
1 tbsp olive oil
1 clove garlic, minced
malt vinegar

  • Tear all of the collard leaves apart and thoroughly wash each of them individually. This will take some time and effort but it's necessary because collards tend to have a lot of dirt on them, even when they're pre-washed.
  • Once the collards are clean, cut the stem out of the center of each leaf and then chop it up into large 2" x 2" pieces. Set aside.
  • Place the ham hock or ham bone in the water. Bring to a boil, cover, and reduce to a simmer. Continue simmering for one hour.
  • Remove the ham bone and set the broth aside.
  • In a large soup pot over medium low heat, saute the garlic in the olive oil.
  • Once the garlic is cooked, add the ham broth to the pan along with the chopped ham. Bring the broth to a boil.
  • Add the collard greens in batches until you can get all of it in the pan. Toss the collards with a pair of tongs until all of it is coated with the ham broth.
  • Reduce the heat to medium, cover, and continue to cook for 30 minutes until the collard greens are soft.
  • Serve the collard greens with a splash of malt vinegar.

Surprisingly, these freeze really well. So if you're a family of three (like us!) then you can serve half and freeze the other half for later!

Tuesday, April 22, 2014

Spinach Salad with Grapefruit Dressing

This is THE BEST salad you will ever have in your life! I cannot get enough of it. I know that the combination of spinach and grapefruit sounds a little weird. But trust me, it's amazing. I'm not a big fan of grapefruit, it's a little too tart for my tastes. But on this salad, it compliments all of the other ingredients so well. Try it!!!


Spinach Salad with Grapefruit Dressing
Makes: 1 serving

Salad:
2 big handfuls of baby spinach
2 tbsp walnuts
2 tbsp crumbled blue cheese
1 large pink grape fruit, cut into segments

Dressing:
1/4 cup cranberry juice
1/4 cup pink grapefruit juice
1/2 cup olive oil
2 tbsp sugar
1 tsp salt
1 shallot, finely minced

  • First make the dressing. Whisk together the cranberry juice, grapefruit juice, olive oil, sugar, salt, and shallot. If you've never used shallots before, they look a little bit like a really small onion and they have a very mild onion flavor. Sometimes they're sold in bulk or they might be sold in a little mesh bag of four or five. This is what they look like:


  •  Once the dressing is made, set it aside.
  • Now toast the walnuts. Place them in a dry pan over medium heat. Swirl them around in the pan until they start to brown and become fragrant. Remove from the heat.
  • Assemble the salad. Start with a bed of the spinach; top it with the toasted walnuts, blue cheese, and grapefruit segments.
  • Drizzle the salad dressing over the salad. The leftover dressing can be kept in the refrigerator for up to two weeks.

Ok, time for some science. When making a vinaigrette like the one above, you're creating an emulsion. An emulsion is a suspension of one liquid in another - in the case of salad dressing, that would be the suspension of the vinegar in the oil. When creating an emulsion, it helps to have emulsifiers - that is something that helps the suspension stay together. With bottled salad dressing, you will usually see xanthan gum in there as the emulsifier. However, you can also use any kind of chopped vegetables as an emulsifier (hence all the little bits of veggies that you see floating in Italian dressing). With our grapefruit vinaigrette, the minced shallot acts as the emulsifier, helping the dressing stay together. The more you know!

Thursday, April 17, 2014

Baked Chiles Rellenos

Chiles rellenos is a traditional Mexican dish. Typically, they are made with a roasted poblano pepper, stuffed with meat and cheese, then coated in an egg batter and fried. My version is a little bit different. Mine are made with anaheim peppers. I also skipped the meat. And I figured since we're already stuffing the thing with cheese, maybe we can skip the frying and bake it instead. This method of slow roasting makes the peppers nice and sweet.

These can be served with beans and rice for a great Meatless Monday meal. Or you can serve them as a side for chicken or fish.

Baked Chiles Rellenos
Makes: 4 servings

4 anaheim peppers
1/4 cup shredded cheddar cheese
1/4 cup shredded monterey jack cheese
1/2 cup shredded pepper jack cheese

  • With a small paring knife, cut the tops off of the peppers and remove the seeds.
  • Mix together the three cheese.
  • Stuff each pepper with 1/4 of the cheese mixture. The peppers are long and skinny so you'll probably need to stuff them a little at a time.
  • Once the peppers are stuffed, place them all side by side on one large piece of aluminum foil. Fold up the foil making sure that it's tight against the tops so that the cheese doesn't come out when it melts.
  • Bake at 350° F for one hour until the peppers are fork tender. Allow to cool for five minutes before serving.

Sunday, March 30, 2014

Chicken & Vegetables in Thai Peanut Sauce

Peanut sauce is one of the easiest sauces you can make. It's a raw sauce - no cooking required. And it's literally just a combination of peanut butter, water, soy sauce, and a few other goodies. I like to add this to some noodles with stir-fry vegetables and some chicken. I used carrots, celery, and onions because that's what I happened to have on hand. You could also use pea pods, mushrooms, asparagus, water chestnuts, or even a bag of frozen stir-fry vegetables! You can also leave out the chicken for Meatless Mondays. This also makes a great make-ahead lunch for the week!


Chicken & Vegetables in Thai Peanut Sauce
Makes: 4 servings

1/2 lb spaghetti, lo mein noodles, or ramen noodles
1 boneless skinless chicken breast, cut into 1/2" cubes
1 cup chopped carrots
1 cup chopped celery
1/2 medium onion, cut into 1/2" dice
8 scallions
2 tbsp canola oil or vegetable oil
2 cloves garlic, very finely minced (or 1/2 tsp garlic powder)
1 tsp fresh grated ginger (or 1/2 tsp dried, ground ginger)
3/4 cup hot water
1/3 cup creamy peanut butter
1/4 cup soy sauce


  • Cook the spaghetti until al dente, about 9 - 10 minutes. Make sure to salt the water well.
  • Strain the pasta.
  • While the pasta is cooking, cut the chicken into 1/2" cubes.
  • Chop the carrots, celery, and onions. Set aside.
  • Slice the scallions, add the white part to the carrots, celery, and onions; set aside the green tops for garnish.
  •  Heat the oil in a skillet over medium high. Add the carrots, celery, and onion mixture. Cook for about 3 minutes until the vegetables just start to soften.
  • Add the chicken to the skillet and continue cooking for 5 - 6 minutes until the vegetables are cooked and the chicken is cooked through and no longer pink. Remove from the heat.
  • Make the sauce by combining the garlic, ginger, water, peanut butter, and soy sauce. It's true that you can use powdered garlic and ginger, but I highly recommend using fresh. There's just nothing like fresh ginger. Whisk the ingredients together - the sauce will have a lumpy texture at first, just keep whisking and it will smooth out.
  • Add the sauce to the hot chicken and vegetables. Add the pasta then toss it all together.
  • Garnish with the green scallion tops.

If you want to make the sauce a little spicy, you could add some Sriracha sauce.

Sunday, March 16, 2014

Grilled Pizzadillas

In case you hadn't guessed, a Pizzadilla is a glorious combination of pizza and quesadillas. I first came across this concept on Pinterest - surprise surprise! Then Matt actually had a Pizzadilla at East Coast Wings and Grill. He loved it so much that it was set in stone - I had to try to make them! I thought I would make this recipe my own by making them on the grill. The weather has been warming up here in the Carolinas and I am so ready for spring and grilling and flip flops!

I made a few pepperoni pizzadillas and a few veggie ones. The veggie ones had olives, mushrooms, and green peppers and they were really delicious. I don't like raw veggies on my pizza/in my quesadillas so I sauteed the veggies first with a little garlic. You can do the same if you want or just throw them on there raw, whichever you prefer.


Grilled Pizzadillas
Makes: 6 pizzadillas

6 large burrito sized flour tortillas
6 oz pizza cheese (mozzarella and cheddar blend)
Toppings such as pepperoni, sausage, bacon, mushrooms, olives, peppers, onions, etc
14 oz jar of plain pizza sauce

  • Preheat the grill on high with the lid down.
  • Once the grill is nice and hot, open the lid. Place 3 - 4 tortillas on the grill at a time, depending on how many will fit on your grill.
  • Carefully top each tortilla with 1 oz of cheese (about 1/4 cup) then add desired toppings. I quickly learned that I couldn't keep my hand over the grill for longer than about 2 seconds because of the heat. So you should expect to have to add the cheese and toppings in short bursts. If it's easier for you, you can make two at a time so that they don't burn by the time you're able to get all of the toppings on.
  • Leave the lid open and allow the pizzadilla to cook. Once the cheese is melted, about one minute, use a grill spatula to fold the pizzadilla in half. Then remove from the grill.
  • Cut the pizzadilla into thirds then serve with warm pizza sauce for dipping.
On the grill!

As I was adding the labels to this post, I asked Matt if this was T1D friendly and he said, "No! God no!" Haha whoops, I guess that answers that question...

Tuesday, March 11, 2014

Baked Stuffed Tomatoes

Matt isn't terribly fond of vegetables. But tomatoes are one thing he will eat. And he loves baked stuffed tomatoes. So, I would say this recipe is kid tested and kid approved. But it's actually husband tested and husband approved which is a more rigorous standard of testing ;-)

When I was trying to decide between getting Boursin or Alouette cheese, I was looking at the labels. Alouette said "all natural!" So I thought I would get that one. But when I looked at the ingredients, it had a bunch of weird stuff like xanthan gum and guar gum. The Boursin didn't have any of that. It was all real ingredients; despite the fact that it didn't do any advertising about how natural it was. Go figure! Anyways, that's just my two cents...


Baked Stuffed Tomatoes
Makes: 3 tomatoes

3 medium tomatoes
pinch of sea salt
1 package Boursin or Alouette herb and garlic cheese
3 tbsp panko bread crumbs


  • Wash the tomatoes. Cut a very small slice off the bottoms (this will help them to stand up straight). Cut off the tops.
  • With a spoon, scoop out the seeds and fleshy membranes so that you have three hollow tomatoes.
    • You don't have to throw away the part that you scoop out. You could cook it down and make it into sauce or dice it up and put it in a salad or an omelette.

  • Sprinkle a little bit of sea salt inside each tomato. Then place the tomatoes in a glass baking dish.
  • Stuff as much cheese as you can get into each tomato. Depending on the size of your tomatoes, you may end up using the whole package of cheese or you may have some left overs. I used up about 2/3 of the package.
  • Very carefully sprinkle one tablespoon of panko on top of each tomato.
  • Bake at 350° F for 20 - 25 minutes until the tomatoes are soft and the bread crumbs are lightly golden brown.
Tip: Store your tomatoes on the counter top instead of the refrigerator to prevent them from developing a bitter flavor.

Saturday, March 8, 2014

Zucchini Fries

I absolutely love zucchini. I'll eat it any way you could possibly make it. The same goes for Lola. One of my favorite ways to eat zucchini is zucchini fries. This is actually something that my mom made when I was growing up. Of course, back then we had never heard of panko; I'm not sure if it was even available here in the states. So she just made them with regular bread crumbs. I really like the panko though, it makes them super crunchy.


Zucchini Fries
Makes: 4 servings

2 large zucchinis
1 1/2 cups panko bread crumbs
1 tsp Italian seasoning
1 clove garlic, finely minced
pinch salt
1/2 cup flour
2 eggs
2 tbsp milk


  • Combine the panko, Italian seasoning, garlic, and salt. Set aside.
  • Whip together the eggs and milk. Set aside.
  • Wash the zucchini well. Cut off the ends, then cut the zucchini in half.

  • Then cut each section into four slices.

  • Then cut each slice into four sticks.

  • Grab 8 - 10 sticks at a time. Dip them in the flour, then the eggs, then the panko.
  • Place the zucchini fries on a lightly greased baking sheet in a single layer, leaving some room between each fry.
  • Once all of the fries have been placed on the baking sheet, lightly spray them with some cooking spray. This will help ensure that they brown well.
  • Bake at 425° F for 15 minutes.
  • Serve with dipping sauce such as ranch, sweet chili, or even marinara.
    Lola approves!

Thursday, March 6, 2014

Butternut Squash Mashup

I love the flavor of squash and sage. It's just such a classic flavor combination and it really goes well together. I served this side with my Pan Seared Sage Chicken. The smooth creamy texture of butternut squash makes it a great dish to serve in place of mashed potatoes. Lola totally loved it and was even asking for seconds. But then again, she's not a normal 2 year old... haha


Butternut Squash Mashup
Makes: 6 servings

1 large butternut squash
1/2 large yellow onion, diced into 1/2" dice
1 clove garlic, minced
1 tbsp olive oil
1/2 tsp rubbed sage
1 tbsp butter or butter substitute
pinch of salt

  • Cut the butternut squash in half length-wise. You should be very careful during this step. Butternut squash is a very hard vegetable and you need a very sharp knife to be able to cut it. See my post about Knife Skills if you haven't already.
  • Scoop out the seeds with a spoon, making sure that you've removed all of the stringy pulp as well.
  • Place the two cut pieces on a baking sheet, cut side down.
  • Bake at 400° F for 30 minutes.
  • Take out of the oven, flip the pieces over so that they are now cut side up, and bake for another 20 - 30 minutes until the squash is very tender and a fork is easily inserted into the thickest part. The squash will be a nice caramelized dark brown color around the edges.
  • While the squash is baking in the oven, cook the onions and garlic. Add the olive oil, onions, and garlic to a skillet over medium-medium low heat. Cook until the onions are tender and translucent, about 12 - 15 minutes.
  • Remove the onions and garlic from the heat and stir in the rubbed sage. Set aside.
  • Once the squash is cooked, remove from the oven and allow to cool for about 5 minutes until it is easier to handle.
  • Scoop out the flesh with a spoon and transfer to a bowl*. The squash will still be a bit hot so it may help to wear an oven mitt to make it easier to scoop out.
  • Once all of the flesh has been scooped out and placed into the bowl, add the onion mixture. Then mash with a potato masher.
  • Once the squash has been mashed to the desired texture, add the butter and salt and stir until the butter is completely melted.
  • Serve as a vegetable side or in place of mashed potatoes.
*Most fruits and vegetables store a lot of nutrients in their skin. By cooking the squash in its skin, it enables us to capture some of those great nutrients. When you're scooping the flesh out of the squash, be sure to really scrape the skin with your spoon to get as close to the skin as you can, extracting as much nutrients as you can.

Wednesday, March 5, 2014

Broccoli with Roasted Garlic Butter

Anyone who says they don't like vegetables probably isn't cooking them right. I wouldn't like vegetables either if all I was doing was steaming them and then slapping some butter on when they're done. Just like any other part of your meal, you've got to add flavor. There are two ways to add flavor to your vegetables:

  1. Cooking method - grilled, braised, roasted, sauteed, etc.
  2. Flavorings - compound butter, various herbs and spices, cheese sauce, teriyaki sauce, etc.

This doesn't mean that your vegetable dish has to be complicated or time consuming. Use the rest of your meal to be your guide on how to cook the vegetable. Are you grilling burgers or chicken? Throw your veggies on the grill too. Are you baking chicken? Throw your veggies on a baking sheet and roast them along side the chicken. Are you pan grilling some steaks? Throw your veggies into the same pan after you've removed the steaks and saute them, flavoring the veggies with all the yummy browned bits at the bottom of the pan.

Tonight, I decided to make it really simple. I steamed some broccoli. But I didn't just top it with plain old butter; I used roasted garlic butter to add more depth of flavor. I happened to already have the garlic butter hanging around - which is always a good idea to have some compound butter in your freezer - but I'll tell you how to make it and you can freeze the left-overs!


Broccoli with Roasted Garlic Butter
Makes: 4 servings

4 large heads of broccoli
1 whole head of garlic
1 tbsp olive oil
4 tbsp unsalted butter, softened

  • First, make the roasted garlic. Cut just the very top off the head of garlic exposing some of the cloves, place the garlic on a piece of tin foil, then drizzle the olive oil over the top. Close up the tin foil.
  • Bake at 400° F for 30 - 40 minutes until the garlic is nice and deep golden brown but not burned. Tip: you can do this in a toaster oven to conserve energy since we're only making one.
  • Remove the garlic from the oven and allow to cool.
  • Once cool, squeeze the head of garlic so that the cloves come out of the skin (almost like a tube of toothpaste). Place the garlic into a food processor.
  • Puree the garlic until smooth.
  • Add the butter to the garlic and continue to puree until completely combined. Note: if you're using a butter substitute like Smart Balance or I Can't Believe It's Not Butter, do not soften it, just place it right into the food processor cold.
  • Now steam the broccoli. Clean the broccoli and cut it into individual florets.
  • Place the broccoli into a steamer basket over boiling water and steam for about 2 - 3 minutes until cooked al dente. If you don't have a steamer basket, you can steam this in the microwave by placing the broccoli in a microwave safe bowl with 2 tbsp of water at the bottom. Cover the bowl with microwave safe plastic wrap and cook on high for about 2 - 3 minutes. Or you could even get the kind that comes in a steamer bag!
  • Toss the broccoli with about 1 tbsp of the roasted garlic butter and serve.
  • If you want to go really crazy you could even sprinkle on some Parmesan cheese. But I was pretty much at my calorie limit for the day so I had to be a good doobie.

That wasn't so hard was it? Now eat your damn veggies!!!

Sunday, March 2, 2014

English Muffin Pizzas

Ok, so English Muffin Pizzas aren't the most extravagant meal I've ever made. But, I'm a real mom with a real family who likes to eat pizza! These are really fun to get the kids involved in cooking. They're also great because they're customizable and anyone can have the toppings they want.

I don't usually buy English muffins because they are kind of heavy on the carbs (gotta love T1D...). But they were on sale and as soon as I saw them, I thought of English muffin pizzas. Call it an 'impulse purchase' but it worked out really well!


English Muffin Pizzas
Makes: 12 mini pizzas

6 English muffins, cut in half
1 jar of plain pizza sauce
12 oz pizza cheese (mozzarella and cheddar blend)
garlic powder
Italian seasoning
pizza toppings (pepperoni, mushrooms, olives, onions, peppers, etc)

  • Place the English muffins on a large baking sheet, cut side up.
  • Bake at 400° F for 5 minutes until lightly toasted. Remove from the oven.
  • Spoon some pizza sauce onto each pizza, then top each with pizza cheese.
  • Sprinkle the desired amount of garlic and Italian seasoning on each pizza.
  • Add desired toppings.
  • Place the pizzas back in the oven and bake for another 5 minutes until the cheese is melted and bubbly.

Thursday, February 27, 2014

Hearty Chicken & Stars Soup

I had some wonderful left-overs from the Sissy's Chicken that I made yesterday so I decided to turn them into soup! Soup is a great way to use up left-overs and it's a great comfort food for this time of year. I happened to have some carrots and zucchini hanging around so that's what I used today. You could also add: mushrooms, spinach, kale, onions, celery, etc. I also used Israeli couscous because that's what I had in my cupboard. Unfortunately, I've found that it's a little difficult to come by. Instead of the couscous, you could use: egg noodles, elbow macaroni, ditalini (little tube shaped pasta), rice, or potatoes. Also, if you don't have chicken left-overs, you could pick up a rotisserie chicken for this recipe.


Hearty Chicken & Stars Soup
Makes: 6 servings

For the broth:
1 whole roasted chicken
2 tbsp canola or vegetable oil
1 cup whole baby carrots
2 cloves garlic
water

For the soup:
Chopped chicken picked from the bone
2 cups chopped baby carrots
2 zucchini cut into bite size pieces
2 - 4 tsp chicken base or chicken bouillon
1 cup Israeli couscous

Make the broth:
      
  • Pick as much chicken as you can off of the bones. Don't worry if there is a lot left on there, it will come off later after the chicken has been simmered. Be very careful to pick out any bones, there are lots of tiny bones in chicken. Set the chunks of chicken aside in the refrigerator.
  • In a heavy bottomed stock pot, pour in the oil and heat over medium. Add the whole carrots and garlic cloves. Stir continuously and cook until the carrots and garlic are a nice golden brown, about 5 - 7 minutes.
  • Place the chicken bones in the pot on top of the carrots and garlic.
  • Add enough water to almost cover the chicken. It took about 10 cups of water for the size chicken that I had.
  • Cover the pot and turn the heat up to high.
  • Once the water has reached a rolling boil, turn the heat down to low-medium-low and continue to simmer, covered for 2 hours.
  • After 2 hours, remove the pan from the heat. With a slotted spoon, scoop out as much chicken and bones as you can. Then pour the broth through a mesh strainer to strain out any remaining pieces of chicken and bone. The easiest way I've found to do this is to place a strainer over a really large mixing bowl, pour the broth into there, then transfer the broth back to the soup pan once it has been strained.
  • Discard the carrots and garlic.
Make the soup:
  • Pick the remaining chicken off the bones, again being very careful to pick out any tiny bones, and add it to the chicken that was picked off previously. You should find that it's much easier to pick apart this time and the chicken just falls off the bone.
  • Discard the bones.
  • Chop up any large chunks of chicken so that all pieces are bite size or smaller.
  • Add the chicken to the broth.
  • Cook on medium, uncovered until the amount of broth reduces by 1/3, about 20 - 30 minutes.
  • Add the chopped carrots and cook for another 10 minutes.
  • Add the zucchini and couscous, cook for another 10 minutes.
  • Remove the soup from the heat.
  • Add the chicken base or chicken bouillon starting with 2 tsp. If the soup tastes bland, add more base or bouillon, 1 tsp at a time, until the soup reaches the desired flavor.
  • Serve with crackers, biscuits, or a nice crusty artisan bread.

Friday, February 21, 2014

Cheesy Chicken Casserole

I'm experimenting with a new idea that I want to call "Cupboard Cleaners." These will be recipes that can easily be made with ingredients that you likely already have in your cupboard, refrigerator, and/or freezer. One thing that completely amazes Matt is that I can look at what we have in the cupboard and just kind of pull a meal out of thin air. Cupboard Cleaners will help you use up those ingredients that you're not sure what to do with - half an onion in the fridge, that last clove of garlic on the counter, that one tablespoon of butter that's left, half a bag of chocolate chips in the cupboard, a bag of couscous, you get the idea. We all have ingredients that have been partially used up in other recipes and then the left overs just seem to hang out with nothing to do but create clutter in the kitchen!

My first Cupboard Cleaner came from just such a scenario. I was cooking dinner last Saturday and I didn't have an idea yet for what I was going to make. I looked in the freezer and saw that I had half a bag of frozen mushrooms, I had half a box of penne in the cupboard, and a very small amount of shredded cheese in the refrigerator. Thus, Cheesy Chicken Casserole was born!

The word "cheesy" is really messing with my brain tonight. It doesn't look like it's spelled correctly. I keep staring at it which makes it worse. I could swear it should be spelled "cheesey" but then that looks even worse. I digress...

Cheesy Chicken Casserole
Makes: 4 servings

1/2 lb penne
2 boneless skinless chicken breasts, cut into 1/2" dice
1 tsp blackened seasoning (I like Zatarain's)
4 oz mushrooms, sliced
1 clove garlic, minced
2 tbsp butter (I use Smart Balance)
2 tbsp flour
1/2 tsp mustard powder
1 bay leaf
2 cups milk
3 slices American cheese
1/4 cup Parmesan cheese
1/2 cup shredded mozzarella cheese, plus more for topping
1/2 cup panko bread crumbs
  • Cook the penne for 11 - 12 minutes, or until al dente. Make sure to salt the water well.
  • Drain the pasta and set aside.
  • While the pasta is cooking, toss the chicken with the blackened seasoning.
  • In a large saute pan over medium high heat, cook the chicken until thoroughly cooked and no longer pink, about 5 - 6 minutes.
  • Set the chicken aside.
  • In the same pan that was used to cook the chicken, heat up the butter over medium heat. Add the mushrooms and garlic. Saute until the mushrooms release their liquid and the liquid evaporates, about 8 minutes.
  • Add the flour to the mushrooms and garlic. Stir to make sure that all of the flour has absorbed the butter. Add the mustard powder and bay leaf.
  • Add the milk and stir until the flour is completely dissolved in the milk.
  • Continue to cook the sauce over medium heat for about 10 minutes, stirring continuously, until the sauce has thickened.
  • Remove the pan from the heat.
  • Remove the bay leaf.
  • Add all three cheeses. Stir until completely melted and the sauce is smooth.
  • Add the chicken and pasta to the sauce.
  • Transfer to a greased 13" x 9" glass baking dish.
  • Top with additional cheese and panko bread crumbs. Since this dish is a whole lot of creamy stuff and not much else, the bread crumbs help to add a little texture and crunch.
  • Bake at 350° F for 20 - 25 minutes until bubbly and brown.
And after all of that, you may be thinking, "ok, but what if I don't have all of those ingredients in my cupboard/refrigerator?" Great question! Here's how you can customize.

Add-ins - instead of chicken or mushrooms, you could add: broccoli, sun dried tomatoes, roasted red peppers, artichoke hearts, olives, spinach, zucchini, summer squash, caramelized onions.
Cheese - instead of American, Parmesan, or mozzarella cheese, you could use: cheddar, Gouda, Havarti, feta, pepper jack, provolone, Swiss, bleu cheese.
Sauce - instead of a milk-based sauce, you could use: chicken broth and white wine, or beef broth and red wine. If you do this, skip the cheese.