|           HOME           |           RECIPES           |           TIPS & TRICKS           |          

Showing posts with label dessert. Show all posts

Wednesday, August 27, 2014

Mini Peach Tarts

Here's another recipe perfect for the seasonal produce right now. Peaches are just reaching their juicy peak. It was pretty tough to decide what to make. I love peach cobbler and peach pie. But, I decided to take the fast and simple route with this one and it worked out great. I mean, you really can't go wrong with puff pastry!
Mini Peach Tarts
Makes: 4 servings

1 sheet puff pastry, thawed
2 medium peaches
2 tbsp sugar
1 tbsp flour
1 tbsp orange juice

  • Leaving the skins on, slice the peaches into 1/8" thick slices. You want them to be very thin so that they'll actually cook in the short cooking time required for puff pastry.
  • Toss the peaches with the sugar and flour. Set aside.
  • Roll out the puff pastry and cut it into 4 even squares using either a sharp knife or a pizza cutter.
  • Place the puff pastry on a lightly greased baking sheet. With a fork, poke holes around the edges, about 1/2" in from the sides.


  • Top the squares with the peach mixture. You can either place the peaches on there carefully in a pattern or just heap them on there for a more "rustic" look. It's up to you.
  • Bake at 400° F for 20 minutes.
  • Allow to cool for about 5 minutes before serving.
 

And because I try to be transparent with my readers, here are the two ugly ones that normally wouldn't make it into the blog haha!

Friday, May 2, 2014

Baklava

If you've never had baklava... I feel sorry for you! It's a Greek dessert made from layers of flaky phyllo dough and a filling made from chopped nuts, sugar, and cinnamon. The final product is then soaked in a simple syrup overnight. Yum! I know you must be sick and tired of phyllo pastries by now, but this is the last one! I promise! It's just that so much dough comes in one box and once you thaw it out, you have to use it. Not that I'm complaining because I love Greek food!

Baklava
Makes: 24 servings

Filling:
16 oz walnuts
3/4 cup brown sugar
1 tbsp cinnamon

Dough:
30 sheets of phyllo dough, thawed
1 1/2 sticks unsalted butter, melted

Syrup:
1 1/4 cups water
1 1/4 cups sugar
1/2 cup honey
  • First make the filling. Grind up the walnuts in a food processor until they are very fine, almost a powder.
  • Transfer the ground walnuts to a large mixing bowl. Mix in the brown sugar and cinnamon. Set aside.
  • With a pastry brush, butter the bottom and edges of a 13" x 9" baking pan.
  • Lay down a sheet of phyllo dough in the bottom of the pan. Gently brush the dough with some butter. Continue until you have six sheets of phyllo dough stacked on top of each other, with butter brushed on each one, including the top one. This will make a nice thick bottom layer.
  • Now sprinkle in about 3/4 cup of the nut mixture over the buttered phyllo dough.
  • Place another three sheets of phyllo dough over the nuts, again buttering each layer, ending with butter on top. Continue this step until you have used all of the nuts. You'll probably get around five or six layers of nuts.
  • For the top layer, you will again use six sheets of phyllo dough, buttering each one, ending with butter on the top.
  • With a very sharp knife, cut the baklava into squares, then cut each square on the diagonal like so:


  • Bake at 350° F for 45 minutes.
  • While the baklava is baking, make the syrup. Combine the water, sugar, and honey in a medium sauce pan. Cook over medium high heat until the sugar is dissolved and the mixture starts bubbling. Reduce the heat to medium and cook for about 10 minutes until it gets a little bit thick and syrupy. Be cautious not to overcook this or you'll burn the sugar. If you notice the color of the syrup turning darker at all, remove it from the heat immediately to prevent burning. Also, make sure you're using a wooden spoon to stir this. Anything else will melt from the heat of the syrup.
  • Once the syrup is cooked, remove it from the heat and allow it to cool. Be very careful as this syrup is extremely hot and can cause very bad burns.
  • Once the baklava is finished cooking, remove it from the oven. Immediately pour the cooled syrup over the entire pan of baklava. At first it will look like the pastry is floating in a pool of syrup. But don't worry, it will all be absorbed.
  • Allow the baklava to cool. Cover it and allow it to sit at room temperature overnight. The next day, most of the syrup will be absorbed and the baklava will be delicate, flaky, and slightly sticky. At this point, you may find that you need to re-cut it. Just go over the same lines you made previously using a sharp knife.
  • Enjoy!

Wednesday, April 23, 2014

Island Mousse

During the holidays, my sister, Lina makes a special dessert. It doesn't really have a name, but I call it cranberry mousse. She mixes pureed cranberries with cool whip and crushed pineapple. It's very low sugar and super yummy. However, the season for cranberries has passed, so I made a little alteration and made it with coconut instead. I think you'll like it!

Island Mousse
Makes: 4 servings

8 oz can of crushed pineapple, drained
8 oz (small) tub of cool whip
3/4 cup unsweetened coconut

  • With a rubber spatula, gently fold all three ingredients together.
  • Serve in individual cups.
  • Garnish with a gingersnap or a single graham cracker.

Sunday, April 20, 2014

Chocolate Strawberry Trifle

I served this chocolate strawberry trifle with Easter dinner (we had our dinner on Saturday night). I love trifles because they're so versatile and so delicious. My favorite trifle involves chocolate cake and chocolate pudding. Yum... Anyhow, this strawberry trifle was also yummy and it makes great use of the strawberries that are coming into season!

Chocolate Strawberry Trifle
Makes: 10 servings

1 boxed vanilla cake, prepared
16 oz (large) tub of cool whip
6 oz (1/2 bag) mini chocolate chips
16 oz (pint) strawberries
  • First, prepare the cake according to the directions on the package. It's easier to bake it in a 13" x 9" cake pan, but you can also make two round cakes instead. Allow the cake to cool completely.
  • While the cake is cooling, cut up the strawberries. You can either slice them or quarter them.
  • Once the cake is cool, cut it up into 1" cubes.
  • In a large bowl, toss in some cake cubes, then strawberries, then cool whip, then chocolate chips. Repeat two more times until you have three layers total.
  • You can garnish the top with a strawberry, a maraschino cherry, or a sprig of mint.

Wednesday, April 16, 2014

Banana Chocolate Chip Cupcakes

We go through bananas like gangbusters in this house. Lola loves them and so do Matt and I. However, every now and then I'll buy a few too many and we can't eat them all before they get too ripe. Not that I mind because it just gives me a great excuse to make banana bread!

I had some overripe bananas the other day but instead of making banana bread, I decided to make some cupcakes with an homage to banana bread. Keeping that in mind, of course I used cream cheese frosting on the cupcakes!

Banana Chocolate Chip Cupcakes
with Cream Cheese Frosting
Makes: 18 cupcakes

Cupcakes:
1 stick unsalted butter, softened
3/4 cup granulated sugar
1/4 cup brown sugar
3 overripe bananas
1 tsp vanilla
1 egg
3 tbsp milk
2 1/4 cups cake flour
1 tsp baking powder
1/2 baking soda
3/4 tsp salt
1 cup mini chocolate chips

Frosting:
16 oz (2 bricks) cream cheese, softened
1 stick unsalted butter, softened
1/2 cup powdered sugar
1 tsp vanilla

Make the cupcakes:
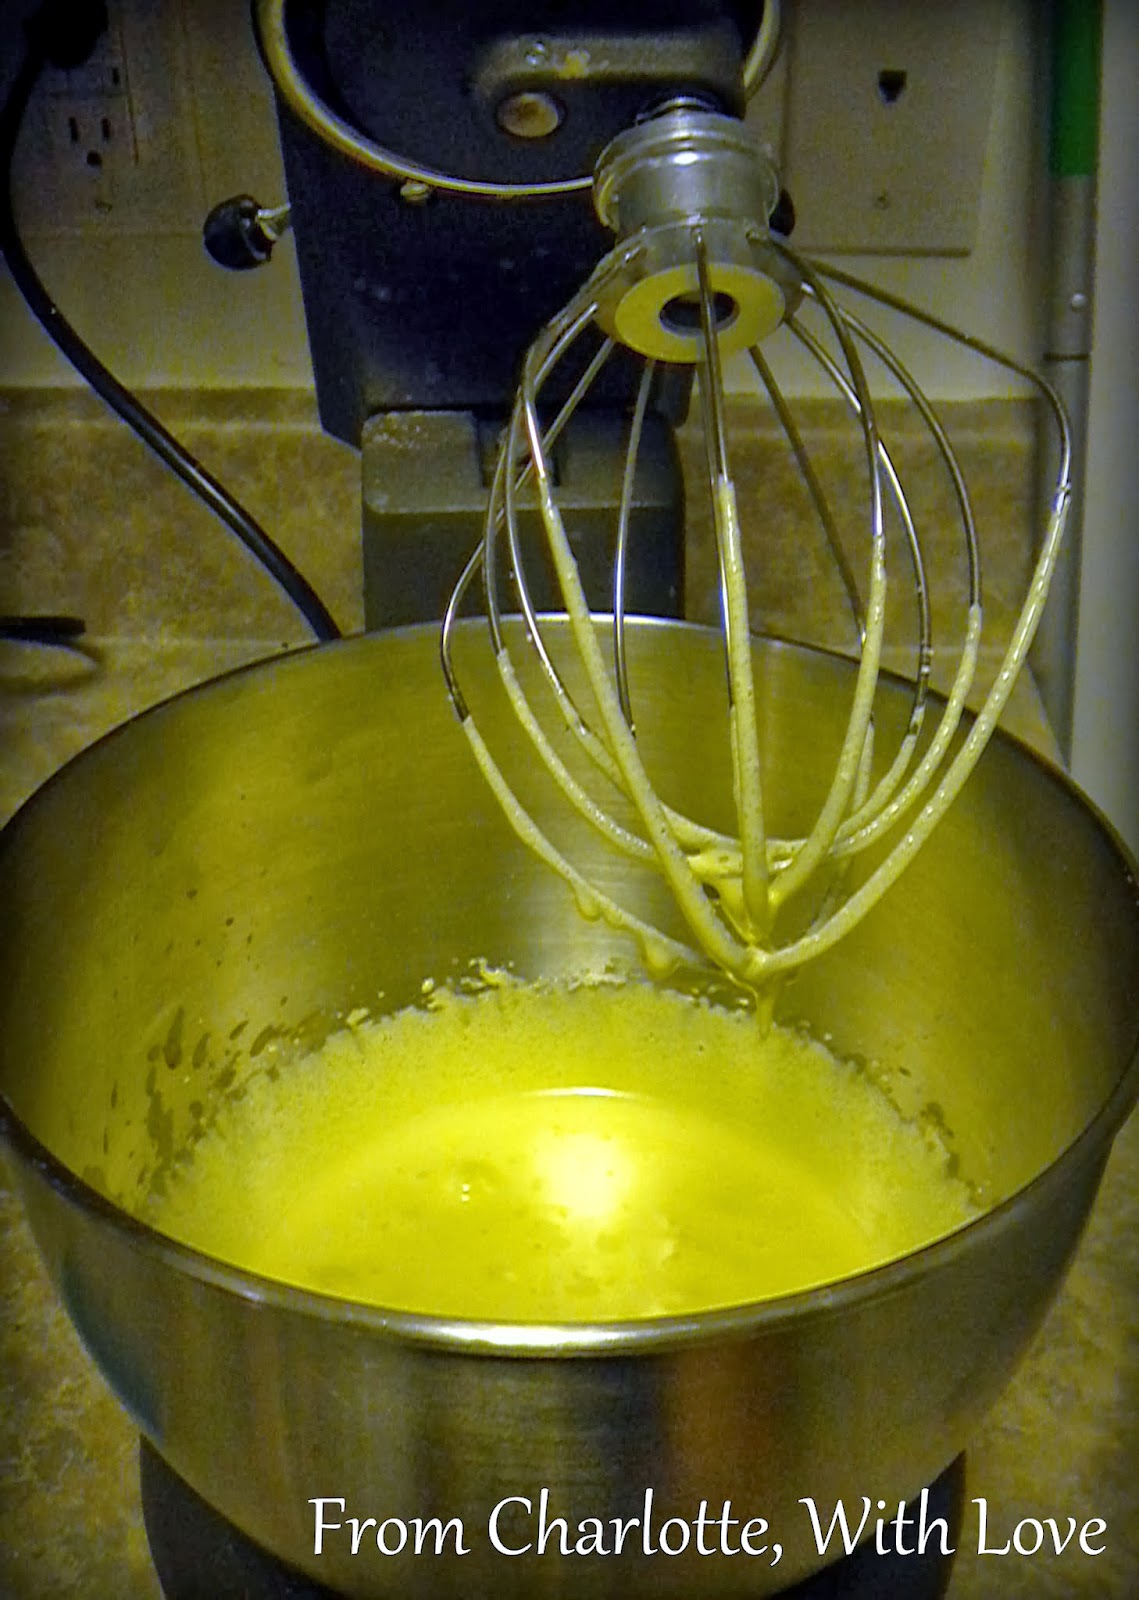
  • In a stand mixer or with an electric hand mixer on medium, cream together the butter and sugar. Whip until light and fluffy.
  • Mash the bananas with a fork. Add them to the butter mixture along with the vanilla, egg, and milk. Mix until combined. Set aside.
  • In a separate bowl, sift together the flour, baking powder, baking soda, and salt.
  • Gently fold the flour mixture and the chocolate chips into the butter mixture.
  • In a cupcake pan prepared with cupcake liners, fill each cupcake liner 2/3 full with batter.
  • Bake at 350° F for 20 - 25 minutes.
  • Allow the cupcakes to cool completely before frosting.
Make the frosting:
  • In a stand mixer or with an electric hand mixer on medium, cream together the cream cheese, butter, and sugar.
  • Add the vanilla and continue to whip on high for about 2 - 3 minutes until light and fluffy.

This made a little bit too much frosting for the amount of cupcakes that I had. But I, uh, took care of that problem... haha

Also note, this recipe, along with all banana bread recipes, really come out better if you use overripe bananas. That way they're nice and soft and their sugars are well developed. Here are the bananas I used for this recipe:

Saturday, April 12, 2014

Plum Crumble with Cardamom Cream

It's springtime! And you know what that means: time for asparagus, avocados, fennel, spinach, strawberries, rhubarb, plums... oh yes! I love spring fruits and vegetables. This will be the first of many posts taking advantage of the seasonal produce.

This plum crumble is a perfect balance of sweet but slightly tart and a little bit of crunch. You can make this an adults only treat by adding two tablespoons of rum to the filling ;-)


Plum Crumble with Cardamom Cream
Makes: 4 servings

Filling:
5 -6 medium plums
2 tbsp sugar
1 tbsp flour
2 tbsp lemon juice
2 tbsp orange juice
zest of 1 lemon
zest of 1 orange

Topping:
1 stick unsalted butter, softened
1/4 cup sugar
1 egg
1/2 tsp vanilla
1 cup flour
1/2 cup sliced almonds
1/4 tsp salt

Cream:
1 cup heavy cream (or whipping cream)
1 tbsp powdered sugar
1/2 tsp cardamom
  • Rinse the plums. Leaving the skin on, cut them in half, remove the pit, then cut them into a 1/2" dice.
  • Toss the plums with the sugar, flour, lemon juice, orange juice, lemon zest, and orange zest.
  • Transfer to either a large glass baking dish or four individual sized ramekins. If you choose to use ramekins, you can place them all on a baking sheet. This makes it easier to remove them from the oven when they're hot.
  • Make the topping. In a stand mixer or with an electric hand mixer on medium, cream together the butter and sugar until light and fluffy.
  • Add the egg and vanilla and stir until combined.
  • Add the flour, almonds, and salt. Mix until just combined. The texture will be dry and crumbly, almost like the texture of bread crumbs.
  • With your hands, sprinkle the topping evenly over the plum filling.
  • Bake at 350° F for 25 - 30 minutes until golden brown and bubbling.
  • Allow to cool for at least 5 minutes before serving.
  • Make the cardamom cream. This comes out best if you chill the bowl and beaters in the freezer for about 30 minutes first. In an ice cold bowl, whip the heavy cream on high speed until stiff peaks form, about 2 - 3 minutes. Add the powdered sugar and cardamom, mix until combined.
  • Serve the cardamom cream on the warm plum crumble.

If you're egg free, either due to allergy or other dietary restriction, you can leave out the egg with out any real impact to the recipe. It just helps the topping stay together a bit better.

If you're wondering why this recipe, like many fruit recipes, calls for lemon juice and orange juice, it's because the acid helps to bring out the flavor. Think of it like salt; it makes food taste more like itself.

And for my final note, if you don't have cardamom, cinnamon will work well too. Though I really do recommend cardamom. It's absolutely delicious and you can find it at any grocery store. It is a little bit pricey (around $10 - $15) but if you need an excuse to buy it, check out my recipe for Cardamom Chocolate Lava Cakes. If that doesn't convince you, I don't know what will!

Friday, April 11, 2014

Blueberry Cheese Blintzes

In case you missed it, here's my first post about cheese blintzes which gives a little bit of background. Matt was begging me to make cheese blintzes again so I finally decided to oblige him. This time, I happened to have some dried blueberries hanging around so I decided to make blueberry cheese blintzes. The results were delicious!


Blueberry Cheese Blintzes
Makes: 8 cheese blintzes

Crepes:
2 cups milk
6 tbsp butter, plus more for cooking
3 eggs
1 1/2 tbsp sugar
pinch of salt
1 cup flour

Filling:
8 oz cream cheese (1 brick), softened
2 tbsp sugar
1 egg yolk
1/2 tsp vanilla
2 tbsp dried blueberries

Topping:
1 egg plus 1 egg white
1/4 cup brown sugar

  • To make the crepes, whisk together the eggs, sugar, and salt until the eggs are pale and fluffy, about two minutes. Set aside.
  • Combine the milk and butter in a small sauce pan. Place over medium heat and stir constantly until the butter in melted.
  • In a slow steady stream, gently pour the hot milk mixture into the eggs while whisking constantly.
  • Add the cup of flour to the egg and milk mixture. Gently whisk until just combined.
  • Preheat a skillet over medium-medium high heat.
  • Once the pan is very hot, add a small amount of butter to the pan, then ladle in about 1/2 cup of batter. Swirl the batter around in the pan so that it spreads to all edges.
  • Cook for about one minute per side until dark brown.
  • Once all of the crepes are cooked, make the filling. Whip together the cream cheese and sugar in a stand mixture or in a bowl with a hand mixer on medium until light and fluffy.
  • Add the egg yolk and vanilla (save the egg white for later). Mix until well combined.
  • With a spatula, fold in the dried blueberries.
  • Place two tablespoons of filling in each crepe, about the size of a golf ball. Spread the filling along the middle of the crepe, then fold it in half. Then fold the ends in and continue rolling up the crepe; just like you would with a burrito.
  • Now whip together the egg white and another egg.
  • Once all of the crepes are assembled, hold the crepe with the seam side toward you. Dip the crepe in the egg, then the brown sugar.
  • Lay the crepes, seam side down (sugared side up) in a lightly greased 13" x 9" glass baking dish.
  • Bake at 375° F for 25 minutes.
  • Allow to cool for at least 5 minutes before serving. These are actually best served room temperature... If you can wait that long!

Sunday, April 6, 2014

Baked Pineapple

I found a wonderful recipe for Gratineed Pineapple via Pinterest. I could immediately tell the recipe was going to be amazing. Pineapple, coconut, sweetened condensed milk, and ginger snaps. Yum! The presentation looks beautiful too, however I can tell just from looking at it that it would be a pain to eat. So I chopped up my pineapple instead. My brother-in-law and nephew were over here the night that I made this. Between those two and my little family of three, we ate the entire pan in one night. It's that good!!


Baked Pineapple
Makes: 6 servings

1 whole pineapple
12 oz can sweetened condensed milk
3/4 cup crushed ginger snaps
1 cup coconut flakes

  • Chop the pineapple into bite sized pieces. See my Tips & Tricks for instructions.
  • Place the pineapple pieces into a lightly greased 13" x 9" glass baking dish.
  • Top the pineapple with the ginger snaps and coconut. I ground the gingersnaps into a fine powder in the food processor. But if you prefer bigger chunks, you could place them in a plastic bag and smash them with a rolling pin, meat tenderizer, or other heavy instrument.
  • Pour the can of sweetened condensed milk over the entire pan of pineapple.
  • Bake at 350° F for 25 - 30 minutes.
Note: this recipe calls for fresh pineapple and I really recommend using fresh. If you use the canned variety, the flavor will be somewhat sour and the texture won't be quite right.

Friday, March 21, 2014

Fudge Sundae Cookies

If you couldn't already tell, I love thumbprint cookies. The base is a delicious butter cookie. From there you can roll the dough in chopped nuts, coconuts, toffee bits, etc. Then you make a little indent with your thumb and fill it with anything delicious like melted chocolate, nutella, fruit jam, lemon curd, the possibilities are endless!

For my Fudge Sundae Cookies, I rolled them in sliced almonds then topped them with chocolate and a cherry. The perfect hot fudge sundae in a cookie!


Fudge Sundae Cookies
Makes: 18 cookies

2 1/4 cups flour
1/2 tsp salt
2 sticks unsalted butter, softened
1/2 cup sugar
1 tsp vanilla
18 maraschino cherries
1 1/2 cups sliced almonds
1 egg, beaten
3 oz (1/2 cup) semi-sweet chocolate
1 tbsp unsalted butter

  • Sift together the flour and salt. Set aside.
  • In a stand mixer fitted with a paddle attachment, whip together the butter and sugar on medium for about two minutes until light and fluffy.
  • Mix in the vanilla on slow speed until combined.
  • Add the flour mixture in three additions until completely combined. The dough should be the texture of bread crumbs.

  • Scoop out two tablespoons of cookie dough, about the size of a golf ball. Roll the dough into a ball.
  • Roll the ball in the beaten egg, then in the almonds until it is completely coated.
  • Place the cookie dough on a baking sheet lined with parchment paper then firmly place your thumb into the center of the ball and make an indent.
  • Repeat until the baking sheet is full. You will likely need to make two batches.
  • Bake at 350° F for 16 - 18 minutes until the cookies are slightly browned and firm.
  • Let cool for two minutes before transferring to a cooling rack.
  • Melt the chocolate and butter together. You can do this either in the microwave or in a bowl over some boiling water. Just be sure not to overheat the chocolate. You don't want it to seize up (turn dry and crumbly).
  • Place about a teaspoon of the chocolate mixture in the thumbprint of each cookie. Then top each cookie with a cherry.

Wednesday, March 12, 2014

Verte Montagne Cupcakes

Time for dessert! To be honest, I'm not much of a baker. Matt is a much better baker than me. But, I figured I need to at least have some dessert recipes on my blog. So here we go!

My inspiration came from my love of Andes candies. I thought, "wouldn't that be delicious to have a cupcake stuffed with Andes?" Yes! It would! If you're one of those weirdos who don't like chocolate and mint, you should turn around and go back to where you came from. We don't take kindly to folks like you around here.

Truth be told, I'm not totally thrilled with how these came out. The Andes ended up sinking to the bottom. I may try this again and stuff the candy into the cupcake after it has been baked. I'll let you know how that goes.


Verte Montagne Cupcakes
Makes: 24 cupcakes

Cupcakes:
1 package boxed cake mix
eggs
water
vegetable or canola oil
8.5 oz package of Andes chocolate and mint candy

Frosting:
2 1/2 cups powdered sugar
1/2 cup unsweetened cocoa
1/2 tsp salt
2 sticks unsalted butter, softened
1 tsp vanilla extract
1 tsp peppermint extract
1/4 cup heavy cream

Make the cupcakes:
  • Mix the cake batter according to the directions on the package. Mine called for 3 eggs, 1 1/4 cups water, and 1/2 cup oil. Yours might be a little different. I know, I know - boxed cake mix! I told you I'm not a great baker ha!
  • Unwrap the Andes candies. Then cut each in half, two at a time, making four squares.


  •  Now stack the four squares.

  • Now insert the stack into each cupcake sideways.

  • Bake the cupcakes according to the directions. Mine took 18 minutes at 325° F. To test when the cupcakes are done, you'll need to gently tap the top of a cupcake. If it bounces right back then it's done. The toothpick test won't work with these cupcakes because the melted chocolate in the center will make it seem like they are still wet in the center. You don't want to overcook your cupcakes - that will make them dry.
  • Allow the cupcakes to cool completely before frosting.
Make the frosting:
  • Resist the temptation to stick the butter in the microwave to soften it. I'm the biggest offender of this rule but this particular recipe really won't work out if you do it that way. You've got to just let the butter sit on the counter for about an hour to let it soften.
  • Sift together the sugar, cocoa, and salt. Set aside.
  • Whip the butter in a stand mixer (or with a hand mixer) on medium for about two minutes until it is light and fluffy.
  • Add the sugar and cocoa mixture, mixing on slow. Mix for about one minute until it is completely combined and a dry crumbly texture.
  • Add the vanilla, mint, and heavy cream.
  • Mix on high speed another two minutes until the frosting is smooth and light and fluffy.
  • If the frosting seems too thin, add some more sugar. If the frosting seems too thick, add some more heavy cream.
  • Frost the cupcakes with an off-set spatula or with a piping bag fitted with a star tip.

Saturday, March 1, 2014

Gâteau aux Fraises

I made strawberry shortcake last night. However, I decided to get a little adventurous and make a sponge cake instead of my usual drop biscuits. It turned out delicious! Although, I probably should have cut the cake recipe in half because now I have a ton of left-over sponge cake that I have no idea what I'm going to do with. What a terrible problem to have haha!

This was great as just regular old strawberry shortcake. But you could also cut the cake up into little pieces and then layer it with the strawberries and cool whip to make a trifle. If you want to make this an 'adults only' dessert, you could replace the orange juice with Grand Marnier or Triple Sec. Yum!


Gâteau aux Fraises
Makes: 6 servings

Cake:
1 cup flour
1/2 cup cornstarch
6 eggs, separated
1 1/2 tsp vanilla
3/4 cup plus 6 tbsp sugar
1/4 tsp salt

Strawberries:
1 pint strawberries
1 tbsp sugar
1 tbsp lemon juice
1 tbsp orange juice

Cool whip or whipped cream

Make the cake:

  • Spray a metal 13" x 9" baking sheet with a thin layer of cooking spray. Add flour to the pan and tap it around so that the flour coats all edges of the pan. Tap the pan while upside down to get rid of any excess flour. Set the pan aside.
  • Sift together the flour and cornstarch. Set aside.
  • Separate the egg yolks from the whites. Set the whites aside.
  • In a stand mixer fitted with a whip attachment or with a hand mixer, beat the egg yolks, vanilla, and 3/4 cup sugar on high for about 3 minutes. Once the mixture is pale and fluffy, transfer it to a different mixing bowl and set aside. This is what it should look like:


  • Wash the whip attachment and bowl thoroughly. This next step will not work if there is even a single speck of egg yolk left on your instruments.
  • Whip together the egg yolks and salt on medium until soft peaks form. This will take about 3 minutes. First the egg whites will become frothy; then you'll slowly start the see the bubbles become extremely tiny and the egg whites will become more and more opaque. You'll also start to see lines in the egg whites trailing behind the whip. These are all signs that you're getting close to a soft peak. You'll know you have soft peaks when you dip the whip attachment into the egg whites, turn it upside down, and the mixture stays on the whip but still falls over and is not stiff, like so:

  • Continue beating the egg whites and slowly add the remaining 6 tablespoons of sugar, one tablespoon at a time. You don't want to add it too quickly or you'll overwhelm the egg whites and lose all of that air you just whipped into them. Once all of the sugar is added, continue beating for about one more minute until the egg whites are glossy and stiff peaks form. You'll know you have stiff peaks when you dip the whip attachment into the egg whites, turn it upside down, and the mixture stands straight up, like so:

  • Scrape the egg whites out of the mixing bowl and add them to the egg yolks that were set aside earlier. Very delicately fold the two mixtures together. If you're unfamiliar with this technique, this is what it should look like:
  • Notice how I gently scrape the spatula through the middle, then around then edges. Just keep doing that over and over until the two mixtures are combined. You don't want to vigorously stir because this will destroy all of those air bubbles you worked so hard to create. The air bubbles are what are going to keep the cake light and fluffy.
    • Note: Eggs can actually act as a leavening agent. In this recipe, you'll notice there's no baking powder or baking soda. That's because the eggs provide plenty of volume on their own. You'll see this in a lot of brownie recipes and other cake recipes. If you notice that your recipe is missing baking powder or baking soda, it's probably not an error; the recipe will most likely call for quite a few eggs.
  • Next, add the flour and cornstarch mixture to the egg mixture in 3 additions. Fold this into the eggs just like you folded the two egg mixtures together; making sure to be very gentle.
  • Pour the cake batter into the greased and floured 13"x 9" baking pan. Smooth the batter with your spatula.
  • Bake at 350° F for 20 - 25 minutes until a tooth pick inserted into the center comes out clean.
Cake recipe adapted from Martha Stewart's Vanilla Sponge Cake

Make the strawberries:
  • While the cake is baking, make the strawberry topping.
  • Rinse the strawberries, cut off the leafy tops, then thinly slice them. Place the sliced strawberries in a glass bowl.
  • Add the sugar, lemon juice, and orange juice. Stir then set aside.
    • Note: these are referred to as 'macerated strawberries.' Maceration refers to the technique where you soften fruit with sugar and some kind of acid. In this case, the acid comes from the lemon juice and orange juice, but balsamic vinegar also tastes great on strawberries.
Assemble the Gâteau aux Fraises:
  • Cut a 2" x 2" piece of sponge cake and place in the bottom of a bowl.
  • Add the strawberry topping.
  • Top with cool whip or whipped cream.

Monday, February 24, 2014

Mexican Sweethearts

Time for another Cupboard Cleaner!

Growing up, my dad used to make us a treat called Mexican Sweethearts. I have no idea if this is actually a traditional Mexican dish - and I have my doubts considering this is the same man who convinced my sister and I that tofu was Chinese bacon... ha! Anyways, Mexican Sweethearts are a great way to use up left-over flour tortillas. There always seem to be a few stragglers after making tacos, enchiladas, etc.

Mexican Sweethearts
Makes: 6 sweethearts

6 flour tortillas (any size)
1 tbsp sugar
1 tsp cinnamon
butter or margarine
  • Mix together the cinnamon and sugar, set aside.
  • Heat up a non-stick skillet over medium-medium high heat.
  • Once the pan is very hot, place one of the tortillas in the dry pan.
  • Cook for about 5 - 10 seconds on each side until they puff up and brown.
  • Remove from heat and spread butter on the tortilla so that it melts.
  • Sprinkle 1/2 tsp of the cinnamon and sugar mixture over the tortilla, then roll it up like a cigar.


This recipe is so simple but your kids will love it and it will clear out all of those extra tortillas hanging out in your cupboard!

Wednesday, February 19, 2014

Nutella & Banana Crepes

Mmmm... Is there anything better than Nutella? I love dipping pretzels and fruit in it and I love spreading it on toast or even a plain shortbread cookie. So far, I haven't been able to get a recipe to work out that actually has Nutella in it (such as cookies for example) but maybe that's just me.

One of the best flavor combinations - in my humble opinion - is Nutella and bananas. These are two very sweet flavors but somehow they go really well together. I actually made these crepes for dinner (I like to live dangerously) but they're also great for breakfast or even dessert!


Nutella & Banana Crepes
Makes: 8 crepes

2 Cups milk
6 Tbsp butter + 2 tbsp for cooking
3 eggs
1 1/2 tbsp sugar
1 pinch salt
1 cup flour
3 bananas
Nutella

  • Combine the milk and butter in a sauce pan. Heat until the butter is melted but the milk is not boiling.
  • In a separate bowl, whisk the eggs and sugar until they are light and fluffy.
  • Very slowly pour a gentle small stream of the hot milk into the egg mixture, whisking the entire time. (This process is called "tempering." You're slowly bringing up the temperature of the eggs versus just dumping the hot milk right into the eggs which would give you a bowl full of scrambled eggs and milk. Not fun.)
  • Add the flour and salt to the egg and milk mixture. Whisk until smooth.
  • Heat a saute pan over medium-medium high until very hot.
  • Add a small pat of butter to the pan then ladle the crepe batter into the center of the pan. Lift the pan from the heat and swirl it around so that the batter spreads to all edges of the pan.
  • Cook for about 30 seconds to one minute until brown. Then flip and cook another 30 seconds until the other side is also brown.
  • Repeat with the remaining batter.
  • Once the crepes are cooked. Spread some Nutella on half of the crepe.
  • Then distribute the bananas on one quarter of the crepe (as pictured to the left).
  • Fold the crepe in half, then in half again so that you have a triangle shape.
  • Repeat with the remaining crepes.
  • Top with whipped cream or cool whip if desired.


By the way, just how much is a pinch of salt? It's generally accepted that a pinch is about 1/8 tsp. It's literally so small it's not even worth measuring. You can easily eye-ball a pinch because it will fit into the palm of your hand when you shape your hand into a cup. Like so: 

Tuesday, February 11, 2014

Coconut Lime Thumbprints

We've been getting some snow here in the Carolinas. We only got a little dusting today but it's supposed to start again overnight and give us about 3" - 5". Everybody run for your lives!!! haha

Anyhow, I thought these coconut lime cookies were a good way to put everyone in the mood for summer. I keep telling myself, "only one more month then spring starts!"

Coconut Lime Thumbprints
Yield: About 18 cookies

Cookies:
2 sticks butter, ice cold
2/3 cup sugar
2 1/2 cups flour
1/4 tsp salt
2 egg yolks, whites reserved
1 tsp vanilla
1 cup sweetened coconut

Lime Curd:
2 eggs
1 egg yolk
1/4 tsp salt
1/3 cup sugar
1/3 cup lime juice

Make the cookie dough:

  • Cut the butter into small cubes.
  • Blend the sugar, flour, salt, and butter in a food processor until the mixture is the texture of cornmeal and it sticks together when you squeeze it in your hand.
  • Whisk together the egg yolks and vanilla (reserve the whites for later). Mix into the flour mixture. The dough will be extremely dry and crumbly. That's what you want.
  • Line a dinner plate with plastic wrap. Dump the dough out onto the plastic wrap then form into a disk. Cover the dough with the plastic wrap and refrigerate for at least 1 hour.
  • While the dough is refrigerating, make the lime curd.

Make the lime curd:

  • Whisk the eggs, egg yolk, salt, and sugar until light and fluffy. Then add the lime juice.
  • Transfer the mixture so a heavy bottomed sauce pan and cook over medium heat stirring constantly.
  • After about 7 -10 minutes, the lime curd should thicken so that it coats the back of a spoon - about the same texture as pudding. You want to make sure that you're stirring constantly, otherwise the curd will turn out lumpy.
  • Once the curd is thickened, remove from heat and transfer to a glass bowl. Immediately top the curd with plastic wrap to prevent a skin from forming on top.
  • Cool the lime curd in the refrigerator for at least one hour.
  • While the lime curd is cooling, bake the cookies.


Bake the cookies:

  • Using a spoon, "cut out" about 2 tablespoons of dough from your disk. Squeeze it between your hand to form it into a ball. It should be about the size of a golf ball.
  • Roll the ball in the reserved egg whites. I found it was easier for me to just place the ball in the bowl of egg whites then brush it with a pastry brush.
  • Then roll the dough ball in the coconut flakes.
  • Place the ball on a baking sheet lined with parchment paper.
  • Press your thumb into the ball of dough so that it flattens slightly and you leave an indentation in the cookie (that's your well for the lime curd!). I found that the dough crumbled a little bit when I pressed it with my thumb, so I had to kind of work with it to reshape it into a circle. Don't be afraid if they're not perfect circles, it gives them character!
  • Bake at 350° F for 20 - 25 minutes.


Assemble:
  • Allow the cookies to cool.
  • Top with a small spoonful of lime curd. This gets a little messy so you want to wait until you're ready to serve the cookies before completing this step.

Thursday, January 30, 2014

Peanut Butter Munchies

Matt got a little box set for Lola a while back that contained Laura Numeroff and Felicia Bond's If You Give a Moose a Muffin, If You Give a Cat a Cupcake, If You Take a Mouse to School, and a couple of activity books. The books are really cute and they're some of Lola's favorites. I haven't really paid much attention to the activity books though because Lola is a little too young for them still. But, tonight I decided to try the recipe for Pop's Peanut Butter Munchies. They were so good!

When I first looked at the recipe I thought, "uhhh something is missing here! Where is the flour?" But they actually turned out perfect! They are super sweet though. Just one is more than plenty to cure your sweet tooth!


Here is the recipe, exactly as it appears in the book:
Pop's Peanut Butter Munchies
1 cup peanut butter (creamy or crunchy)
1 cup sugar
1 egg

  • Combine all ingredients in a bowl. Mix well.
  • Using your hands, roll the dough into one-inch balls and drop onto a lightly greased cookie sheet.
  • Bake at 350° F for 10 - 12 minutes until golden brown. Press the tines of a fork into each cookie while still soft.
Some of my own notes: I used parchment paper which works a lot better than greasing the cookie sheet. Also, the cookies stay together better if you allow them to cool for about 2 minutes before you transfer them to a cooling rack.

Friday, January 17, 2014

Classic Cheesecake

Who doesn't love cheesecake?! I think this is one of those desserts that you can pretty much count on everyone liking. And the best part about cheesecake is that it's basically a blank canvas - albeit a delicious canvas! You can swirl in any number of flavors -  fruit, chocolate, caramel; add little goodies to the crust - nuts, chocolate chunks, oreo crumbs; and/or top it with delicious toppings - chocolate ganache, macerated berries, berry sauces, caramel sauce... mmmmm......

There's honestly nothing special about my cheesecake recipe. It's pretty much as basic as you can get. The only thing you might find different about it is the amount of sugar. My cheesecake has about half the amount of sugar you would typically find in a cheesecake recipe. The reason is because I like the delicate balance between sweet and savory. I don't want to just be overwhelmed by sweet. Plus it will help add balance if you add a bunch of sweet additions like chocolate or caramel.

Classic Cheesecake
Crust:
1 1/2 cups graham cracker crumbs (about 1 sleeve of graham crackers)
2 tbsp sugar
6 tbsp unsalted butter, melted

Filling:
4 bricks of cream cheese (1 brick is 8 oz), softened
1 cup sugar
4 eggs
1 tsp vanilla
  • Preheat oven to 325° F.
  • Combine the graham crackers and the sugar.
  • Brush a 9" spring-form pan with some of the melted butter.
  • Mix the remaining butter into the graham cracker mixture.
  • Dump the graham cracker mixture into the spring-from pan and press it down with your fingers making sure that the crust reaches all of the edges but does not go up the sides.
  • Bake for 15 - 18 minutes until golden brown.
  • Allow crust to cool completely.

  • In a stand mixer fitted with a paddle attachment or with a hand mixer, cream together the cream cheese and sugar.
  • Add the eggs and vanilla. Mix until fully combined.
  • Pour the filling into the cooled crust.
  • Place the spring form pan into a deep roasting pan. Transfer the roasting pan to the oven, then fill with boiling water so that the spring form pan is surrounded by water. Just be sure not to get any on the cheesecake!
    • This technique is called a water bath. It allows the cheesecake to cook more evenly and minimizes the risk of the dreaded crack in the middle of the cheesecake.
  • Bake at 325° F for 1 hour and 15 minutes.
  • Do not open the oven door! Turn off the oven and leave the cheesecake in for another hour (for a total cooking time of 2 hours and 15 minutes). This will allow the cheesecake to finish cooking gently in the residual heat. This also protects from getting a crack in your cheesecake.
  • Remove the cheesecake and allow to cool for 1 hour at room temperature. Then refrigerate for at least 8 hours before serving.


Remember how I said you can customize this recipe? Well, I made mini cheesecakes! Instead of a graham cracker crust, I placed a whole oreo at the bottom of each cupcake liner and then filled them with the batter.


Some of my favorite variations of cheesecake:
  • Turtle - Add chopped pecans to the graham cracker crust; top the cooled cheesecake with drizzles of chocolate and caramel.
  • White Chocolate Macadamia - Add chopped macadamia nuts to the graham cracker crust; pour white chocolate ganache over top of the cooled cheesecake, allow to chill for at least 1 more hour.
  • White Chocolate Raspberry - Add 4 oz of melted white chocolate to the cheesecake batter; pour over graham cracker crust, then swirl in raspberry jam before baking.
  • Coconut Lime - Add flaked coconut to the graham cracker crust; replace vanilla with 2 tbsp lime juice and add the zest of 1 lime to the cheesecake batter.
  • Brownie Batter - Make fudge brownie mix, reserve 2/3 cup, pour the rest of the brownie batter into bottom of spring-form pan, bake for the normal recommended time, remove from oven then allow to cool; pour half of the cheesecake filling over the cooled brownie crust, mix the reserved brownie batter with the remaining half of the cheesecake filling, swirl together with the plain cheesecake filling, bake as normal.