|           HOME           |           RECIPES           |           TIPS & TRICKS           |          

Showing posts with label side dish. Show all posts

Sunday, August 17, 2014

"Un-fried" Squash

As I mentioned in my Fried Squash post, southerners love their fried squash. It can be breaded or battered. But... since we're trying to be healthy here, I decided to try an un-fried version! I think it tastes just as good as the fried version! In fact, it was so good I didn't feel like it needed any kind of dipping sauce. It was delicious on its own.

"Un-fried" Squash
Makes: 4 servings

2 summer squash
1/2 cup canola oil
2 cloves garlic, minced
1 tsp dried Italian herbs
1/2 tsp crushed red pepper flakes
1/2 tsp sea salt
  • Rinse the summer squash and pat them dry. Cut the squash into 1/2" circles. Set aside.
  • Make the marinade by mixing together the canola oil, garlic, herbs, pepper flakes, and salt.
  • Add the squash and marinade to a gallon size plastic bag, then toss to coat the squash. Marinate in the refrigerator for at least 1 hour.
  • Remove the squash from the marinade and grill on high for 2 minutes per side.
  • Serve as an appetizer or as a side dish.

Fried Squash

Fried squash is another southern treat that I was sadly deprived of until I moved to Charlotte. Apparently it's a big deal around here. Southerners love their fried squash. Almost as much as fried pickles haha! I've seen some people use a batter on their squash and some people bread it. I like it both ways, but today I decided to bread it. And... since it's swim suit season, I'll decided to try my hand at some "Un-fried" Squash. They both came out excellent if I do say so myself!


Fried Squash
Makes: 4 servings

2 medium summer squash
2 cups plain bread crumbs
1/2 tsp sea salt
1/2 tsp garlic powder
1 tsp dried Italian herb mix
1/4 tsp cayenne pepper
2/3 cup flour
4 eggs
1/4 cup milk
canola oil for frying


  • Fill a stainless steel fry pan with 1" of oil and preheat over medium-medium-high.
  • Rinse the summer squash and pat them dry. Then cut them into 1/4" slices. Set aside.
  • Mix together the bread crumbs, salt, garlic, herbs, and cayenne pepper.
  • In a separate bowl, whisk together the eggs and milk.
  • Dip the squash into the flour, then the egg mixture, then the bread crumb mixture.
  • Once all of the slices of squash are coated in bread crumbs, lay them out in a single layer on a plate and allow to sit for at least 5 minutes. This will allow the breading to harden a little bit and prevent cracking when you fry it.
  • Fry the squash in batches, making sure not to overcrowd the pan. Once the squash is golden brown, about 3 - 4 minutes per side, remove from the oil and allow to drain.
  • Serve with dipping sauce such as marinara.

Monday, August 4, 2014

Spinach Sauté

This recipe is pretty similar to my Spinach and Mushrooms recipe from a couple months ago. But I added a little flair to it with some red pepper so I figured it deserves its own post. Plus spinach is in peak season right now so you can never have too many spinach recipes!

Spinach Sauté
Makes: 4 servings

8 oz mushrooms
1 clove garlic, minced
1/2 yellow onion, very thinly sliced
1 red pepper, 1/2" dice
1 tbsp olive oil
1 tbsp butter or margarine (I used Smart Balance)
4 big handfuls of baby spinach
pinch of sea salt

  • Rinse the mushrooms well, cut off the stems, then cut them into thin slices.
  • Over medium heat, saute the mushrooms, garlic, onions, and peppers in the olive oil and butter. Sprinkle a pinch of sea salt over the mixture. The mushrooms will release quite a bit of liquid. The liquid will eventually evaporate. Continue cooking until the mushrooms are a light golden brown and the onion and pepper are soft. Total cooking time will take about 12 - 15 minutes.
  • Add the spinach to the mushroom mixture, sprinkle another pinch of sea salt on the spinach. Cook until the spinach is just wilted, about one minute.


This is a great side dish for dinner or toss in some sliced grilled chicken for a filling lunch!

Monday, May 19, 2014

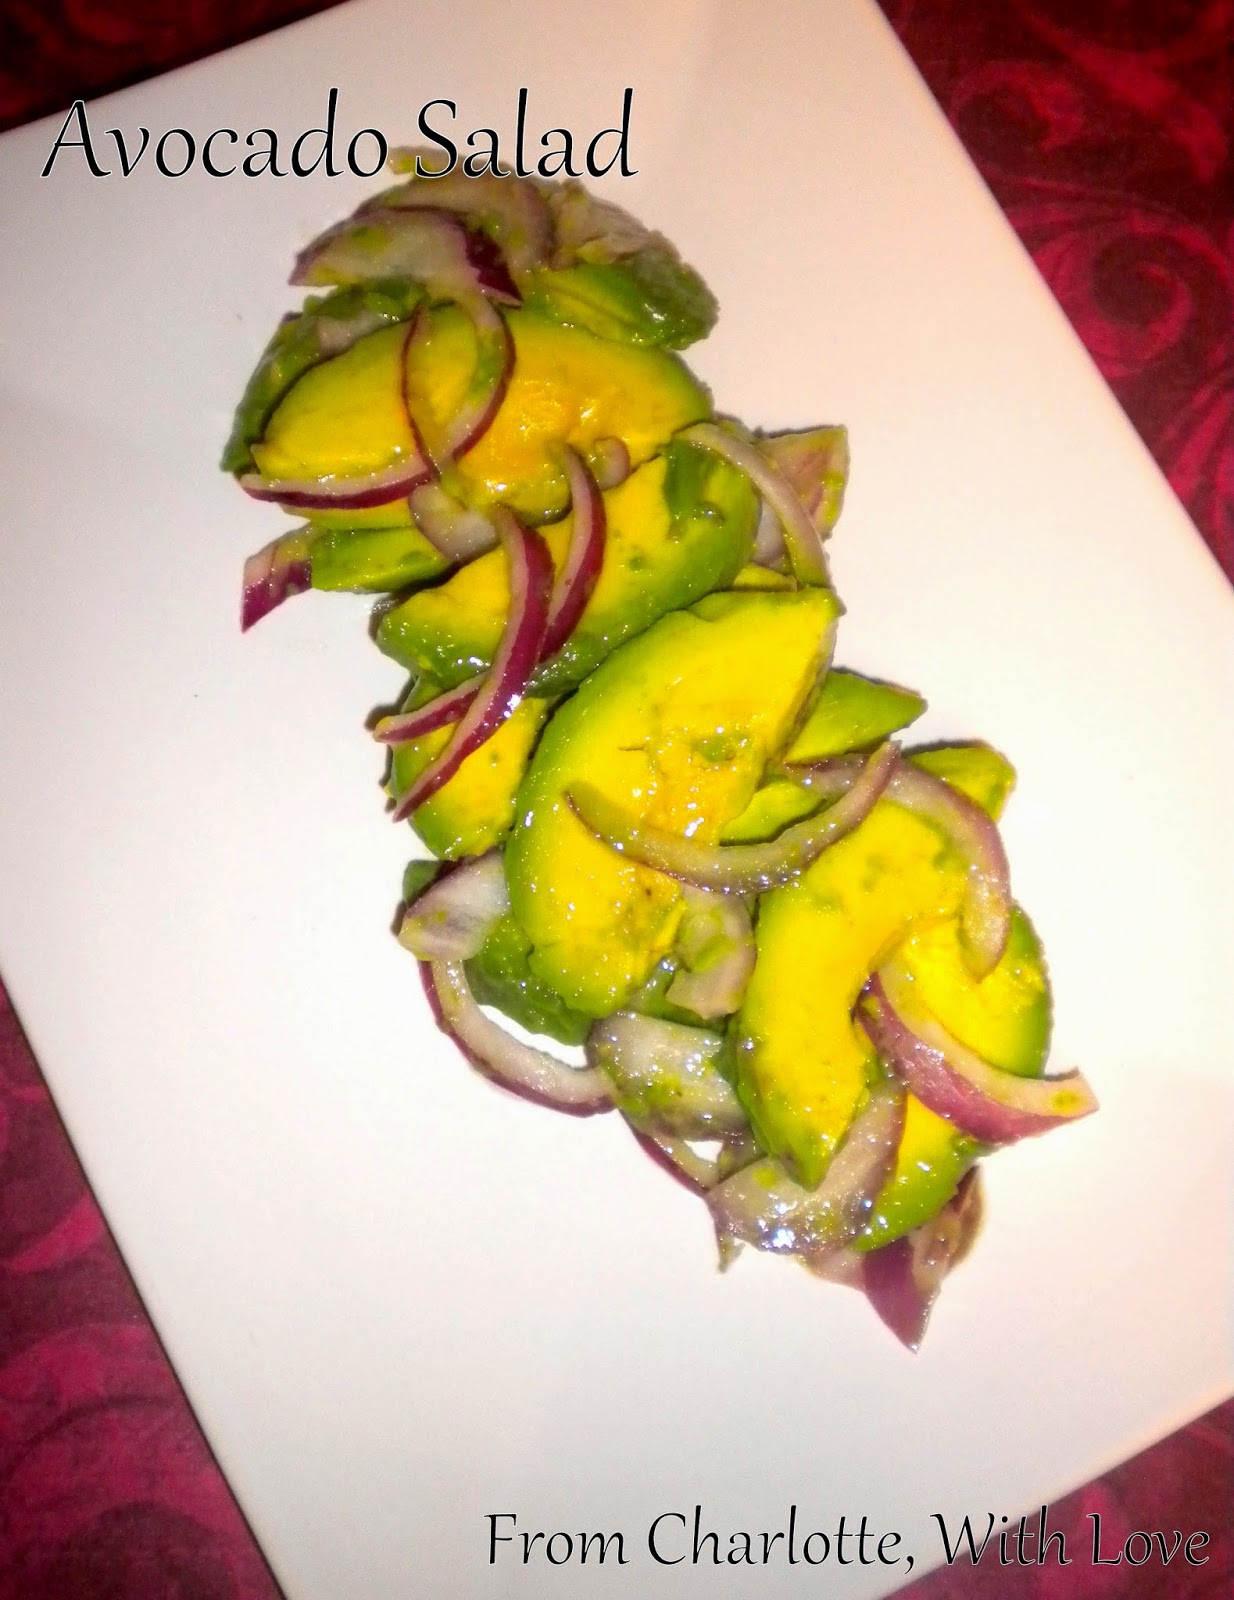
Avocado Salad

I actually got the recipe for avocado salad from my boss. She was eating it at work one day and it looked really good so I asked her about it. She told me she had it at a restaurant and it was so good she went home and recreated it. It's super simple but amazingly delicious. You can make a single serving for a light lunch or several servings as an appetizer for a get-together.

Avocado Salad
Makes: 1 serving

1 ripe avocado
3 - 4 paper thin slices of red onion
1 tbsp olive oil
1 tbsp lime juice
pinch sea salt
  • Cut the avocado in half and remove the pit. Cut each half into slices, then scoop them out of the shell. Place the slices in a glass bowl.
  • Add the onion, olive oil, lime juice, and sea salt. Gently fold it all together with a spoon or rubber spatula.
  • Serve on a bed of baby spinach, with some tortilla chips, or with a warm flour tortilla.

Monday, May 5, 2014

Spinach & Mushrooms

As promised, I'm trying to get as much use as I can out of the wonderful spring fruits and vegetables. I just love spinach, especially baby spinach. This is a quick, simple vegetable side dish with a ton of flavor. This might even be the one that gets your kids to eat spinach!!


Spinach & Mushrooms
Makes: 4 servings

8 oz mushrooms
1 clove garlic, minced
1 tbsp olive oil
1 tbsp butter or margarine (I used Smart Balance)
4 big handfuls of baby spinach
pinch of sea salt

  • Rinse the mushrooms well, cut off the stems, then cut them into thin slices.
  • Over medium heat, saute the mushrooms and garlic in the olive oil and butter. Sprinkle a pinch of sea salt over the mushrooms. The mushrooms will release quite a bit of liquid. The liquid will eventually evaporate. Continue cooking until the mushrooms are a light golden brown. Total cooking time will take about 12 - 15 minutes.
  • Add the spinach to the mushrooms, sprinkle another pinch of sea salt on the spinach. Cook until the spinach is just wilted, about one minute.
  • This makes a nice bed for a piece of grilled chicken or steak!

Wednesday, April 9, 2014

Broccoli Casserole

I'm guessing this is a southern thing because I had never heard of it before I moved to Charlotte. The first time I ever had broccoli casserole, it was at an office potluck. I honestly wasn't too impressed. It was too salty and it seemed more like the rice was the star of the show, not the broccoli. So here's my version; I hope you like it.

Broccoli Casserole
Makes: 8 servings

1 cup quinoa
2 cups chicken broth
1 clove garlic, minced
1 tbsp olive oil
1 tbsp butter (or butter substitute)
1 tbsp flour
1 1/2 cups milk
1 egg
1 cup shredded cheddar cheese, plus 1/4 cup for topping
4 scallions, chopped
3 large heads of broccoli
1/4 tsp salt
1/4 tsp pepper
2 tbsp Parmesan cheese
2 tbsp panko bread crumbs

  • Rinse the broccoli then cut it into bite sized pieces. Set aside.
  • Rinse the dry quinoa in a fine mesh strainer in some cold water. Transfer the quinoa to a small sauce pan, add the chicken broth, then cover and bring to a boil over high heat.
  • Bring the heat down to low and simmer for 15 - 20 minutes until all of the water is absorbed.
  • While the quinoa is cooking, make the cheese sauce. Add the garlic, olive oil, and butter to a saute pan. Cook over medium heat until the garlic is fragrant.
  • Add the flour to the sauteed garlic and continue to cook another 2 minutes over medium heat until the flour turns a pale golden brown.
  • Whisk together the milk and egg.
  • Now, add the milk mixture to the pan and continue stirring constantly until the milk starts to bubble and thicken, about 5 - 7 minutes.
  • Remove the sauce from the heat and stir in the 1 cup of cheddar cheese until the cheese is melted. Add the salt and pepper to the cheese sauce.
  • In a large mixing bowl, mix together the quinoa, broccoli, scallions, and cheese sauce.
  • Transfer the mixture to a lightly greased baking dish such as a brownie pan.
  • Top with 1/4 cup of cheddar cheese, then the Parmesan cheese, then the panko. Spray the top with a little bit of spray oil. This will help the casserole to brown.
  • Bake at 400° F for 20 minutes.
This pairs really well with chicken, fish, pork chops, or steak. It's even great by itself for lunch!

Thursday, March 27, 2014

Couscous with Pine Nuts & Parmesan

Couscous is a great side dish for chicken, fish, or pork. It's pretty much a blank slate that you can do whatever you want with. I like to cook it in some chicken broth to start off with flavor. Then add additional flavors from there. You can also use this as a foundation for a Meatless Monday meal and add a whole ton of sauteed vegetables - zucchini, summer squash, carrots, tomatoes, etc.

This recipe is for Moroccan couscous. This is the kind that is most widely available in the states; it's extremely tiny beads of pasta. The recipe calls for instant couscous; that's pretty much the only kind that's sold here. So don't worry if your packaging doesn't specifically say "instant," I guarantee that it is.


Couscous with Pine Nuts & Parmesan
Makes: 4 servings

2 cups chicken broth (or 2 cups water with 2 tsp chicken bouillon)
1 cup instant couscous
1/4 cup pine nuts
2 tbsp Parmesan cheese
2 tbsp olive oil
  • Toast the pine nuts by placing them in a dry skillet over medium heat. Swirl around the nuts constantly so that they don't burn. This should take about five minutes. Make sure to really keep your eye on it, the nuts can burn quickly. Once toasted, set aside.
  • Bring the chicken broth to a boil over high heat.
  • Add the couscous to the chicken broth, cover, and remove from the heat. Allow to sit covered for 7 minutes.
  • Fluff the couscous with a fork.
  • Fold in the pine nuts, Parmesan, and olive oil.

Friday, March 14, 2014

Stove-Top Potatoes Au Gratin

This is another recipe that my sister-in-law, Erica has graced us with. She had us over for dinner a few weeks ago and made some amazing pork chops with asparagus and these amazing potatoes as sides. She made them with red potatoes which are great because you can leave the skin on. I love this because, not only does it cut down on prep time, there are a lot of great nutrients in potato skins.


Stove-Top Potatoes Au Gratin
Makes: 6 Servings

6 medium red potatoes
1 tsp or cube of chicken bouillon
1/4 cup butter (or Smart Balance)
1/2 cup sour cream (I used a reduced fat one)
1/2 cup shredded cheddar cheese


  • Cut the potatoes into a 1" dice.
  • Cover the potatoes in cold water, add the bouillon, cover, and heat over medium high heat.
  • Once the water is boiling, take off the lid and continue to cook for 20 minutes until the potatoes are fork tender.
  • Strain the potatoes then place then back into the pan. Stir in the butter and sour cream but don't mash!
  • Then stir in the cheese until completely melted. Serve!

Thursday, March 13, 2014

Southern Fried Pickles

My sister-in-law, Erica is a true southern gal; born and raised in North Carolina. If you live around here, you'll know how rare it is to meet someone who is actually originally from North Carolina. Erica is a self described "terrible cook." However, I beg to differ. She has taught me a lot about southern cooking and tradition. Her Southern Fried Pickles are to die for! She has informed me that all southern women have their own recipe for breading and it's a heavily guarded secret. So consider yourselves lucky that she has decided to share her secret with us!


Southern Fried Pickles
Yield: 4 servings

16 oz jar of dill pickles
1 cup flour
1/3 cup plain bread crumbs
2 tsp seasoned salt
1/2 tsp onion powder
1/2 tsp garlic powder
1 tsp cayenne powder
2 eggs
1/4 cup milk

  • Preheat a deep fryer or heavy bottomed dutch oven filled with 1" of oil to 375° F.
  • Drain the jar of pickles but do not rinse them.
  • Combine the flour, bread crumbs, seasoned salt, onion, garlic, and cayenne. Set aside.
  • Whip together the eggs and milk.
  • Soak the pickles in the egg mixture for 1 minute.
  • Toss the pickles in the flour and bread crumb mixture then shake off any excess.
  • Fry the pickles until golden brown, about 2 - 3 minutes.
  • Serve with ranch - we mixed a little sriracha sauce into our ranch!
Note: The first time I ever made these, I made the grave mistake of getting bread and butter pickles. It was terrible. I don't know how much more I can say about this other than, "just don't." Make sure to get dill pickles.

And in case you didn't think I was completely insane yet... This post has inspired the name of Erica's new puppy - Simon James Alexander Ragsdale Picklesworth III M.D. but you can just call him Professor Pickles for short.

Tuesday, March 11, 2014

Baked Stuffed Tomatoes

Matt isn't terribly fond of vegetables. But tomatoes are one thing he will eat. And he loves baked stuffed tomatoes. So, I would say this recipe is kid tested and kid approved. But it's actually husband tested and husband approved which is a more rigorous standard of testing ;-)

When I was trying to decide between getting Boursin or Alouette cheese, I was looking at the labels. Alouette said "all natural!" So I thought I would get that one. But when I looked at the ingredients, it had a bunch of weird stuff like xanthan gum and guar gum. The Boursin didn't have any of that. It was all real ingredients; despite the fact that it didn't do any advertising about how natural it was. Go figure! Anyways, that's just my two cents...


Baked Stuffed Tomatoes
Makes: 3 tomatoes

3 medium tomatoes
pinch of sea salt
1 package Boursin or Alouette herb and garlic cheese
3 tbsp panko bread crumbs


  • Wash the tomatoes. Cut a very small slice off the bottoms (this will help them to stand up straight). Cut off the tops.
  • With a spoon, scoop out the seeds and fleshy membranes so that you have three hollow tomatoes.
    • You don't have to throw away the part that you scoop out. You could cook it down and make it into sauce or dice it up and put it in a salad or an omelette.

  • Sprinkle a little bit of sea salt inside each tomato. Then place the tomatoes in a glass baking dish.
  • Stuff as much cheese as you can get into each tomato. Depending on the size of your tomatoes, you may end up using the whole package of cheese or you may have some left overs. I used up about 2/3 of the package.
  • Very carefully sprinkle one tablespoon of panko on top of each tomato.
  • Bake at 350° F for 20 - 25 minutes until the tomatoes are soft and the bread crumbs are lightly golden brown.
Tip: Store your tomatoes on the counter top instead of the refrigerator to prevent them from developing a bitter flavor.

Saturday, March 8, 2014

Zucchini Fries

I absolutely love zucchini. I'll eat it any way you could possibly make it. The same goes for Lola. One of my favorite ways to eat zucchini is zucchini fries. This is actually something that my mom made when I was growing up. Of course, back then we had never heard of panko; I'm not sure if it was even available here in the states. So she just made them with regular bread crumbs. I really like the panko though, it makes them super crunchy.


Zucchini Fries
Makes: 4 servings

2 large zucchinis
1 1/2 cups panko bread crumbs
1 tsp Italian seasoning
1 clove garlic, finely minced
pinch salt
1/2 cup flour
2 eggs
2 tbsp milk


  • Combine the panko, Italian seasoning, garlic, and salt. Set aside.
  • Whip together the eggs and milk. Set aside.
  • Wash the zucchini well. Cut off the ends, then cut the zucchini in half.

  • Then cut each section into four slices.

  • Then cut each slice into four sticks.

  • Grab 8 - 10 sticks at a time. Dip them in the flour, then the eggs, then the panko.
  • Place the zucchini fries on a lightly greased baking sheet in a single layer, leaving some room between each fry.
  • Once all of the fries have been placed on the baking sheet, lightly spray them with some cooking spray. This will help ensure that they brown well.
  • Bake at 425° F for 15 minutes.
  • Serve with dipping sauce such as ranch, sweet chili, or even marinara.
    Lola approves!

Thursday, March 6, 2014

Butternut Squash Mashup

I love the flavor of squash and sage. It's just such a classic flavor combination and it really goes well together. I served this side with my Pan Seared Sage Chicken. The smooth creamy texture of butternut squash makes it a great dish to serve in place of mashed potatoes. Lola totally loved it and was even asking for seconds. But then again, she's not a normal 2 year old... haha


Butternut Squash Mashup
Makes: 6 servings

1 large butternut squash
1/2 large yellow onion, diced into 1/2" dice
1 clove garlic, minced
1 tbsp olive oil
1/2 tsp rubbed sage
1 tbsp butter or butter substitute
pinch of salt

  • Cut the butternut squash in half length-wise. You should be very careful during this step. Butternut squash is a very hard vegetable and you need a very sharp knife to be able to cut it. See my post about Knife Skills if you haven't already.
  • Scoop out the seeds with a spoon, making sure that you've removed all of the stringy pulp as well.
  • Place the two cut pieces on a baking sheet, cut side down.
  • Bake at 400° F for 30 minutes.
  • Take out of the oven, flip the pieces over so that they are now cut side up, and bake for another 20 - 30 minutes until the squash is very tender and a fork is easily inserted into the thickest part. The squash will be a nice caramelized dark brown color around the edges.
  • While the squash is baking in the oven, cook the onions and garlic. Add the olive oil, onions, and garlic to a skillet over medium-medium low heat. Cook until the onions are tender and translucent, about 12 - 15 minutes.
  • Remove the onions and garlic from the heat and stir in the rubbed sage. Set aside.
  • Once the squash is cooked, remove from the oven and allow to cool for about 5 minutes until it is easier to handle.
  • Scoop out the flesh with a spoon and transfer to a bowl*. The squash will still be a bit hot so it may help to wear an oven mitt to make it easier to scoop out.
  • Once all of the flesh has been scooped out and placed into the bowl, add the onion mixture. Then mash with a potato masher.
  • Once the squash has been mashed to the desired texture, add the butter and salt and stir until the butter is completely melted.
  • Serve as a vegetable side or in place of mashed potatoes.
*Most fruits and vegetables store a lot of nutrients in their skin. By cooking the squash in its skin, it enables us to capture some of those great nutrients. When you're scooping the flesh out of the squash, be sure to really scrape the skin with your spoon to get as close to the skin as you can, extracting as much nutrients as you can.

Wednesday, March 5, 2014

Broccoli with Roasted Garlic Butter

Anyone who says they don't like vegetables probably isn't cooking them right. I wouldn't like vegetables either if all I was doing was steaming them and then slapping some butter on when they're done. Just like any other part of your meal, you've got to add flavor. There are two ways to add flavor to your vegetables:

  1. Cooking method - grilled, braised, roasted, sauteed, etc.
  2. Flavorings - compound butter, various herbs and spices, cheese sauce, teriyaki sauce, etc.

This doesn't mean that your vegetable dish has to be complicated or time consuming. Use the rest of your meal to be your guide on how to cook the vegetable. Are you grilling burgers or chicken? Throw your veggies on the grill too. Are you baking chicken? Throw your veggies on a baking sheet and roast them along side the chicken. Are you pan grilling some steaks? Throw your veggies into the same pan after you've removed the steaks and saute them, flavoring the veggies with all the yummy browned bits at the bottom of the pan.

Tonight, I decided to make it really simple. I steamed some broccoli. But I didn't just top it with plain old butter; I used roasted garlic butter to add more depth of flavor. I happened to already have the garlic butter hanging around - which is always a good idea to have some compound butter in your freezer - but I'll tell you how to make it and you can freeze the left-overs!


Broccoli with Roasted Garlic Butter
Makes: 4 servings

4 large heads of broccoli
1 whole head of garlic
1 tbsp olive oil
4 tbsp unsalted butter, softened

  • First, make the roasted garlic. Cut just the very top off the head of garlic exposing some of the cloves, place the garlic on a piece of tin foil, then drizzle the olive oil over the top. Close up the tin foil.
  • Bake at 400° F for 30 - 40 minutes until the garlic is nice and deep golden brown but not burned. Tip: you can do this in a toaster oven to conserve energy since we're only making one.
  • Remove the garlic from the oven and allow to cool.
  • Once cool, squeeze the head of garlic so that the cloves come out of the skin (almost like a tube of toothpaste). Place the garlic into a food processor.
  • Puree the garlic until smooth.
  • Add the butter to the garlic and continue to puree until completely combined. Note: if you're using a butter substitute like Smart Balance or I Can't Believe It's Not Butter, do not soften it, just place it right into the food processor cold.
  • Now steam the broccoli. Clean the broccoli and cut it into individual florets.
  • Place the broccoli into a steamer basket over boiling water and steam for about 2 - 3 minutes until cooked al dente. If you don't have a steamer basket, you can steam this in the microwave by placing the broccoli in a microwave safe bowl with 2 tbsp of water at the bottom. Cover the bowl with microwave safe plastic wrap and cook on high for about 2 - 3 minutes. Or you could even get the kind that comes in a steamer bag!
  • Toss the broccoli with about 1 tbsp of the roasted garlic butter and serve.
  • If you want to go really crazy you could even sprinkle on some Parmesan cheese. But I was pretty much at my calorie limit for the day so I had to be a good doobie.

That wasn't so hard was it? Now eat your damn veggies!!!

Sunday, January 19, 2014

Walnut Parsley Pesto

I really love pestos. They're so easy, so delicious, and completely customizable. Traditionally when we think of pesto, we think of basil, pine nuts, garlic, olive oil, and Parmesan cheese. However, you can make pesto out of any combination of herbs, cheese, olive oil, and nuts. Here are a few of my favorites:

  • Sun dried tomatoes, garlic, basil, Parmesan cheese, and olive oil.
  • Roasted red peppers, garlic, oregano, asiago cheese, and olive oil.
  • Artichokes, chives, garlic, walnuts, Parmesan cheese, and olive oil.
  • Arugula, pine nuts, garlic, lemon zest, cracked black pepper, Parmesan cheese, and olive oil.
You get the point! Gather some ingredients that taste great together, puree them into a smooth paste, then toss with warm pasta. Today I made a walnut parsley pesto.


Walnut Parsley Pesto
1/2 cup toasted walnuts
2 cloves garlic
2 tbsp chopped fresh parsley (or 1 tbsp dried parsley)
1/4 cup Parmesan cheese

1/3 cup olive oil
1 lb linguine (or fettuccine, spaghetti, etc)

  • Combine the walnuts, garlic, parsley, Parmesan cheese, and olive oil in a food processor.
  • Puree until smooth.
  • Cook the pasta until al dente making sure to add plenty of salt to the water.
  • Once the pasta is cooked, strain it then immediately transfer to a bowl. While the pasta is still hot, add the pesto and toss until all of the noodles are coated.
This makes a great side dish for grilled chicken, steak, or fish. Today I happened to be making this for lunch. I separated it into 4 portions and placed them into plastic containers that I can just grab when I'm on my way out the door to work!

Note: if you only have raw walnuts, you can toast them by adding them to a dry saute pan over medium heat. When the nuts start to release their aroma, swirl the nuts around in the pan. Once they are golden brown, remove them from the pan. You don't want to take your eye off of this for one single second! The nuts could burn in a matter of seconds. And burned nuts smell... bad..

Wednesday, April 3, 2013

Chicken Cordon Bleu with Green Beans Almondine

Wow, it's been a while since I've posted. We were on vacation last week visiting our family back home in Massachusetts. It was a lot of fun. Those vacations never last long enough...

Anyways, onto the reason we're here! We had Chicken Cordon Bleu for dinner tonight. I love this dish because it seems so fancy but it really is simple. It's an easy weeknight dinner and it will pass the test with even the pickiest eaters (ahem! Matt!). You can serve this with potatoes, rice, or pasta. Tonight we had pasta. I like to keep a common theme with my meals and a great way to do that is to use the same herbs on the vegetables or pasta/rice/potatoes as you use on the meat.


Chicken Cordon Bleu
2 Chicken breasts, cut in half lengthwise so that you end up with 4 pieces of chicken
1 Cup panko bread crumbs
1 Tbsp chives, chopped
2 Tbsp olive oil
1 egg, beaten
1/4 lb sliced ham
1/4 lb sliced Swiss cheese

  • Place a chicken breast on your work surface. Layer 1 slice of cheese, 2 slices of ham, then 1 more slice of cheese on top of the chicken. Leave about ¾" of room at the top end of the chicken breast.
  • Roll up the chicken, ham, and cheese. Then secure with 3 toothpicks.
  • Repeat with the remaining chicken breasts.
  • Mix together the bread crumbs, chives, and olive oil.
  • Dip each chicken roll in the beaten eggs, then roll in the bread crumb mixture.
  • Place the chicken rolls on a greased baking sheet, seam side down.
  • Bake at 400° F for 30 to 35 minutes, until cooked through.
  • Don't forget to remove the toothpicks!
While the chicken is baking, you can make the pasta and green beans.


Garlic and Chive Pasta
1/2 lb penne or other tube pasta
3 Tbsp olive oil
1 Tbsp butter (I actually use Smart Balance)
2 cloves garlic, finely minced
1 Tbsp chives, chopped

  • Cook the pasta until al dente, making sure to salt the water well.
  • Meanwhile, heat the olive oil and butter over medium heat. Add the garlic and cook for about 2 minutes until fragrant and soft.
  • Strain the pasta, then add to the garlic and olive oil.
  • Add the chives, then toss together.
Green Beans Almondine
1/2 lb green beans (I use the kind that come in the steamer bag)
2 Tbsp toasted slivered almonds
Salt and Pepper

  • Steam the green beans until al dente. Make sure you don't over-cook them!
  • Toss with the toasted almonds. Add salt and pepper to taste. I like a lot of pepper on mine.

Tuesday, March 19, 2013

Roasted Broccoli

I'm not a very big broccoli person. It seems to be one of those vegetables you either love or hate. I'm one of the weirdos that is just kind of so-so about it.  However, I absolutely love this dish. I know I've said it before but I love roasted vegetables. They are so flavorful and interesting. This is another one of Lola's favorites too. And your house will smell amazing while it's cooking. Which seems weird because broccoli usually stinks but the garlic is really the dominant flavor in this dish.

Roasted Broccoli
2-3 heads of fresh broccoli or 16 oz frozen
1/4 Cup olive oil
1 clove garlic, minced
1/3 Cup grated parmesan

  • Clean and trim the broccoli if you are using fresh. If you are using frozen, defrost it and then squeeze out as much excess water as you can.
  • Toss together the broccoli, olive oil, garlic, and parmesan.
  • Roast in a single layer on a baking sheet at 400° F for 20 minutes, turning half way through.


You'll notice that this recipe does not call for salt. It is honestly plenty flavorful on it's own with out any added salt.


If you want to be extra fancy, you can squeeze some lemon juice and grate some lemon zest over the broccoli once you remove it from the oven. Although I usually just make it according to the recipe above.

Tuesday, February 19, 2013

Roasted Italian Vegetables

This one is another favorite of Lola's.  It's one of my favorites too!  I love roasting vegetables as well as braising, grilling, sauteing, anything that's more interesting than just steaming and then slapping some butter or cheese sauce on top.  This recipe so versatile but simple.  Tonight, we just ate this plain as a vegetable side dish.  But, I love adding this to fettuccine alfredo or a quiche, etc.

Roasted Italian Vegetables

2 Large zucchini
2 Large summer squash
1 Pint grape tomatoes
2 Cloves garlic, minced
1 Tsp Italian herbs
1/4 Cup canola oil
  • Cut the zucchini in half long-wise, then slice so that you get a half moon shape.  Repeat with the summer squash.
  • Toss together the zucchini, summer squash, tomatoes, garlic, herbs, and canola oil.
  • Spread out in a single layer on a baking sheet.  (It is critical that you do not salt the vegetables at this stage.  This will cause them to release their liquid which will hinder the caramelization process.)
  • Bake at 400° F for 40 - 45 minutes, tossing half way through.
  • Once cooked, you can add salt or parmesan cheese.  This is so flavorful, though, that I don't feel the need to add anything.


This dish is also delicious when you add eggplant and cremini mushrooms!


Wednesday, February 6, 2013

Garlic Herb Grilled Chicken and Parmesan Pasta

Ok, here we go!  First post!

This recipe is a favorite of my husband's.  The oil sauce on the pasta is delicious and so different from the traditional red sauce or cream sauce that you usually find on pasta.  My husband actually refused to try it at first haha.  He was convinced that he wouldn't like pasta if it didn't have tomato sauce on it.  Now, he begs me to make it every week.

Matt and I actually call this pasta dish "Rattlesnake Pasta" because it's spicy. But, I didn't think that sounds as nice as "Parmesan Pasta" so I renamed it for my blog ;)

Parmesan Pasta:
½ Lb Farfalle, Penne, or other pasta
2 Tbsp Butter
2 Tbsp Olive oil
2 Cloves Garlic, minced
1/4 Tsp Crushed red pepper flakes (optional)
1/2 Tbsp Dried parsley or 1 Tbsp fresh parsley, chopped
1/3 C Parmesan cheese
  • Cook the pasta until al dente.  (make sure to heavily salt the water, there's nothing worse than unseasoned pasta!)
  • While the pasta is cooking, sauté the garlic over medium heat until fragrant, about 1 - 2 minutes.  Add the crushed red pepper flakes and remove the pan from the heat.
  • Add the strained pasta, parmesan cheese, and parsley and toss to coat.
On to the chicken!  I usually make this on our George Foreman grill because we live in an apartment, so outdoor grilling isn't always a possibility.

Garlic Herb Marinade:
1/3 Cup Canola oil
1 Tsp garlic powder
1 Tsp Italian herbs (I usually use the McCormick blend)
  • Whisk together all ingredients.  Marinate the chicken for at least 10 minutes before grilling or baking.
  • This marinade can be used for chicken, seafood, pork, or vegetables.
You can reserve some marinade for your vegetable side.  I like to slice zucchini and summer squash into long strips, marinate them in the Garlic Herb Marinade, and then grill those on the George Foreman grill.  Delicious!